
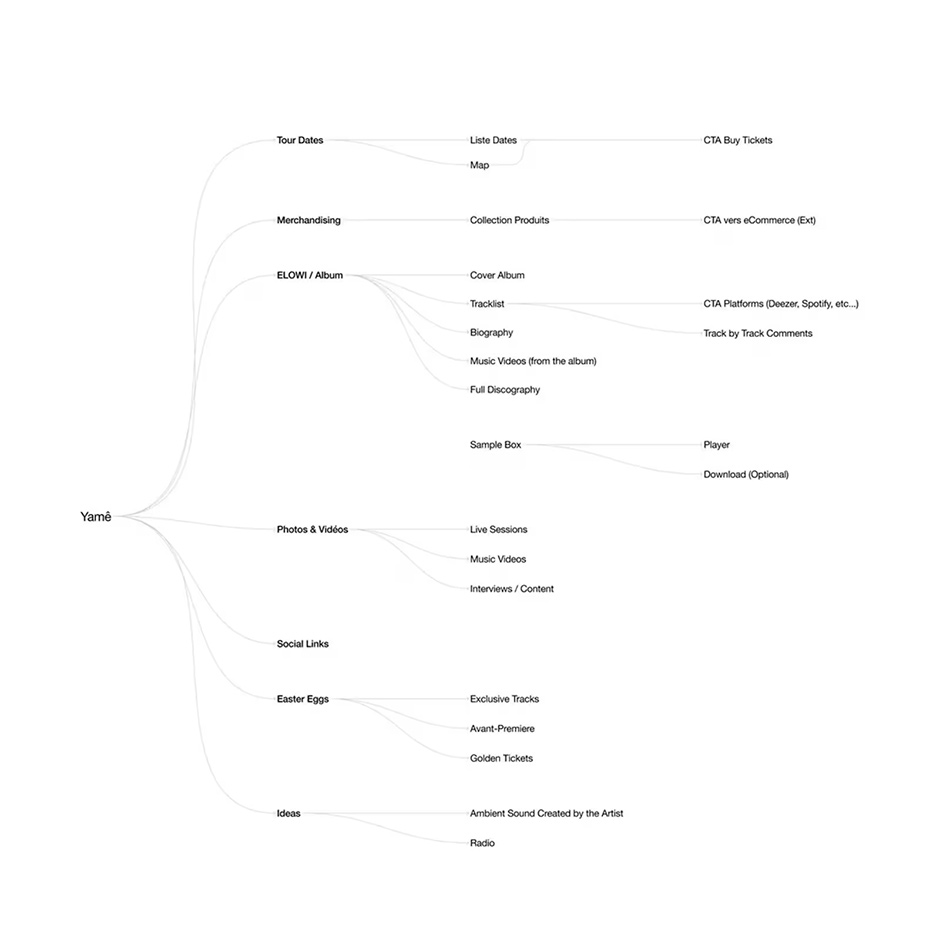
Yamê is a multifaceted artist who has built a rich universe around his music, deeply rooted in his family's Cameroonian heritage.
For his album *Ebêm*, he envisioned a complete experience including a short film (produced by the studio Mathematics) that tells the overarching concept, and an immersive website that allows users to freely explore this lore—uncovering hidden gems, exclusive content, and key milestones of his journey, such as his COLORS performance with over 100 million views.
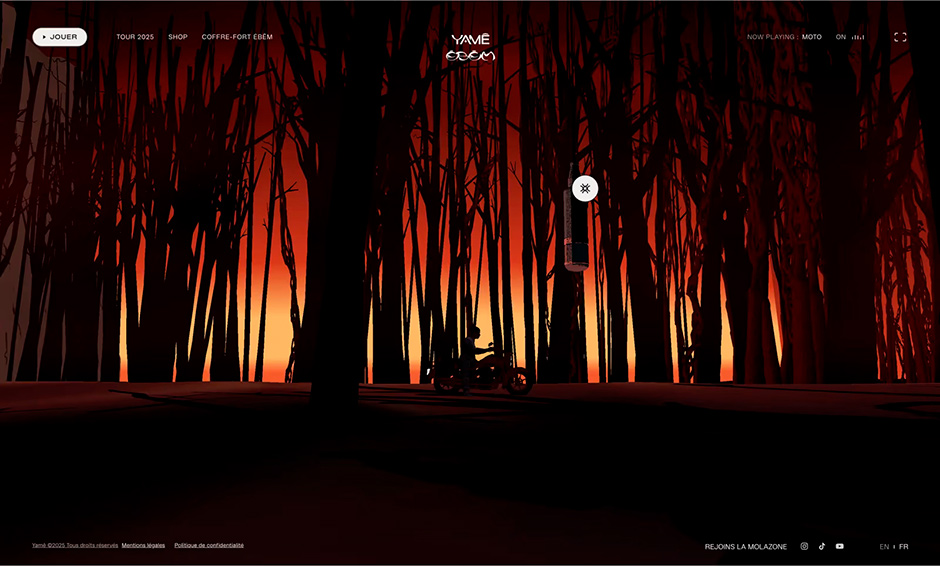
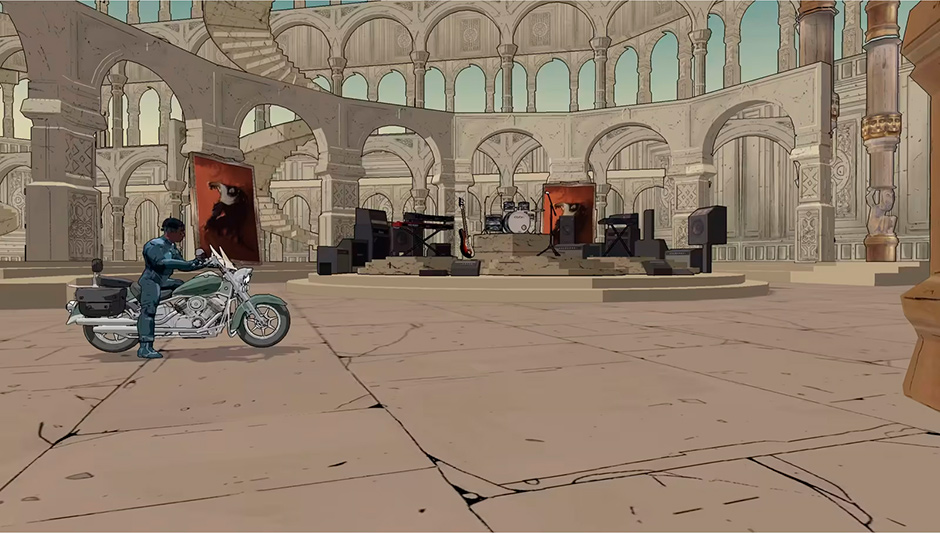
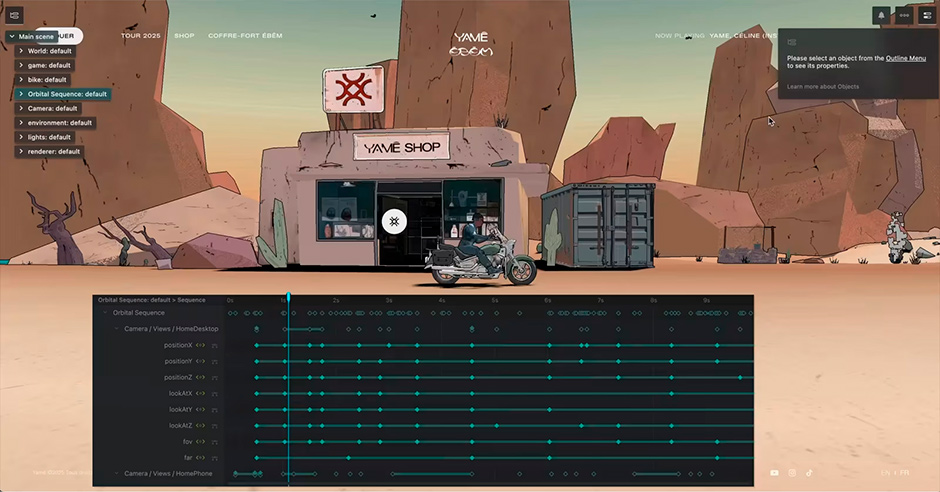
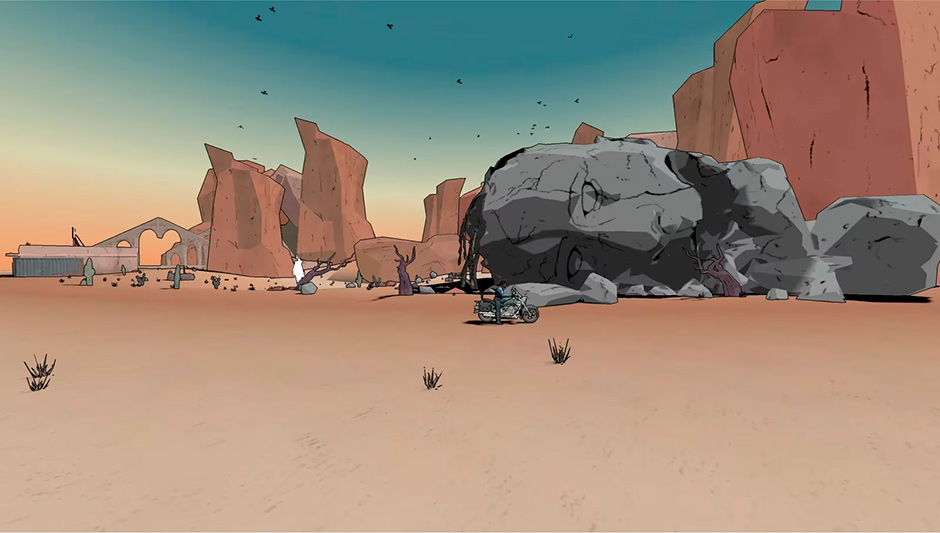
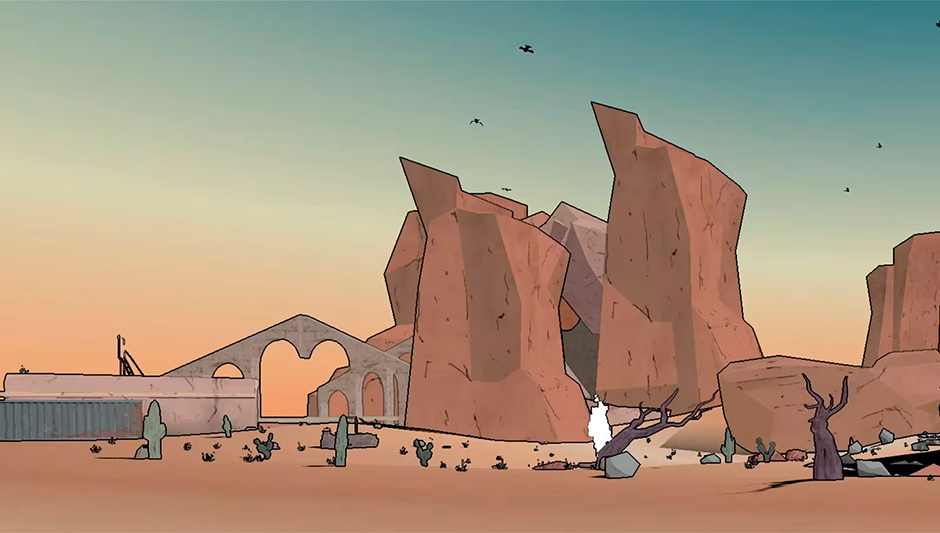
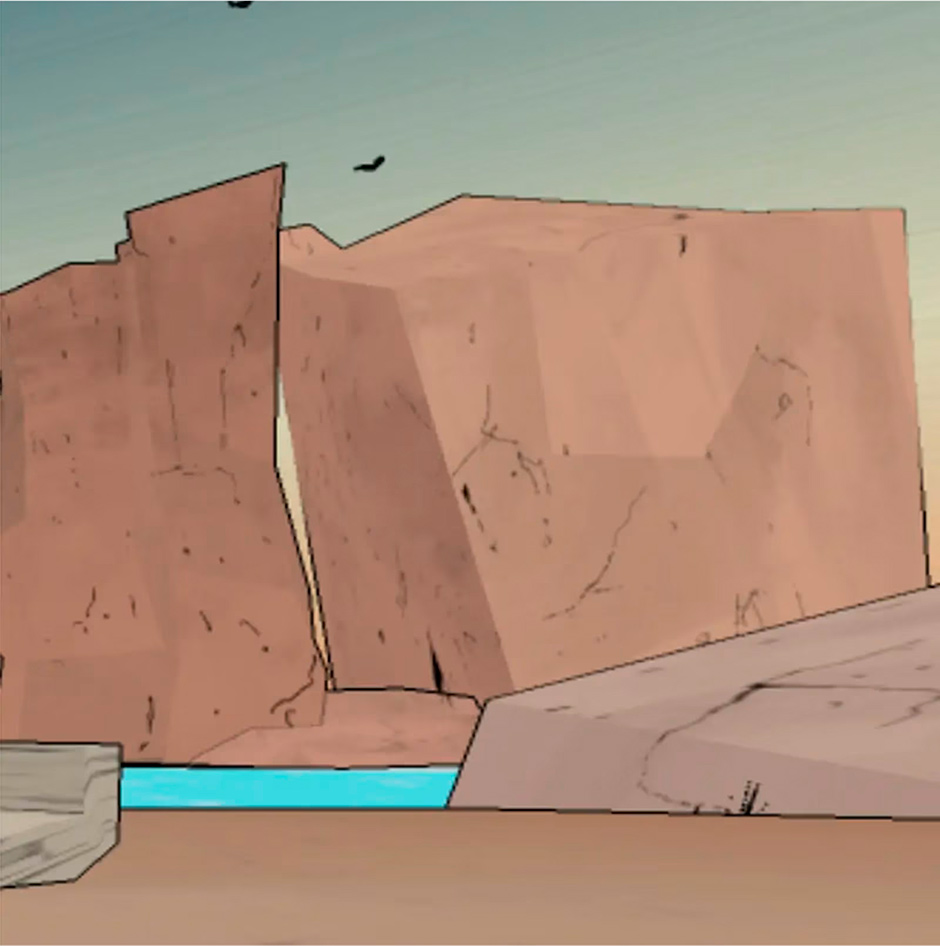
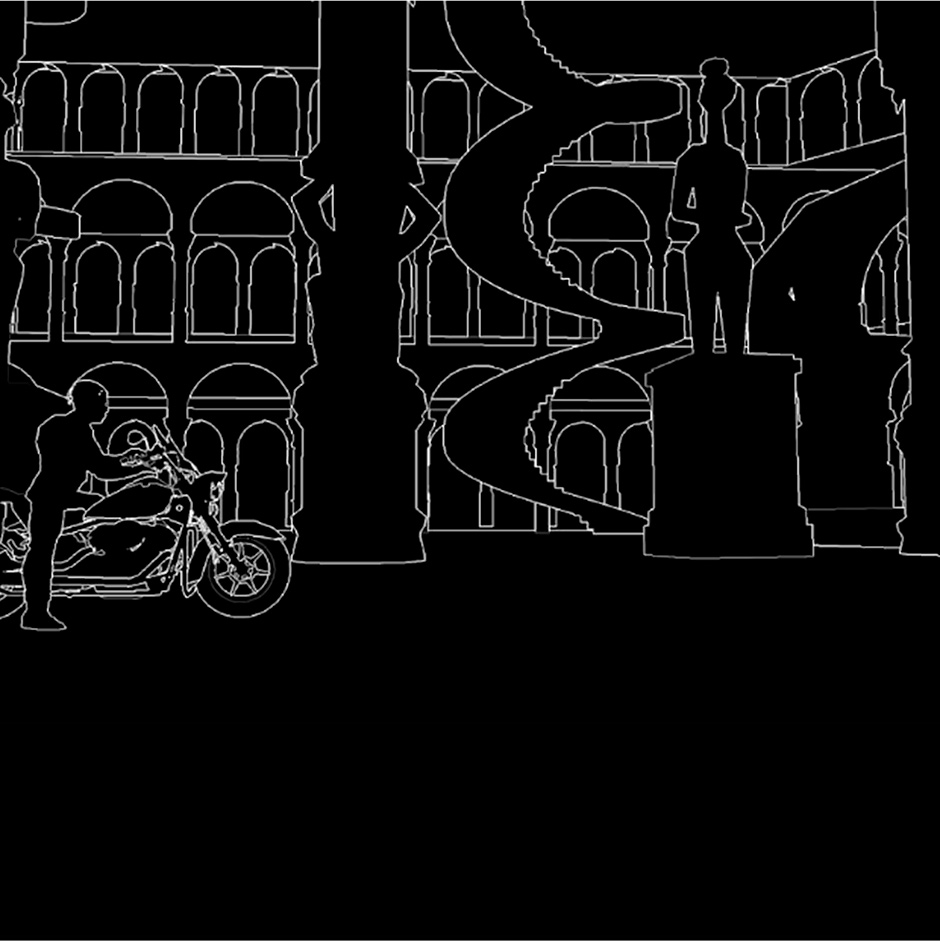
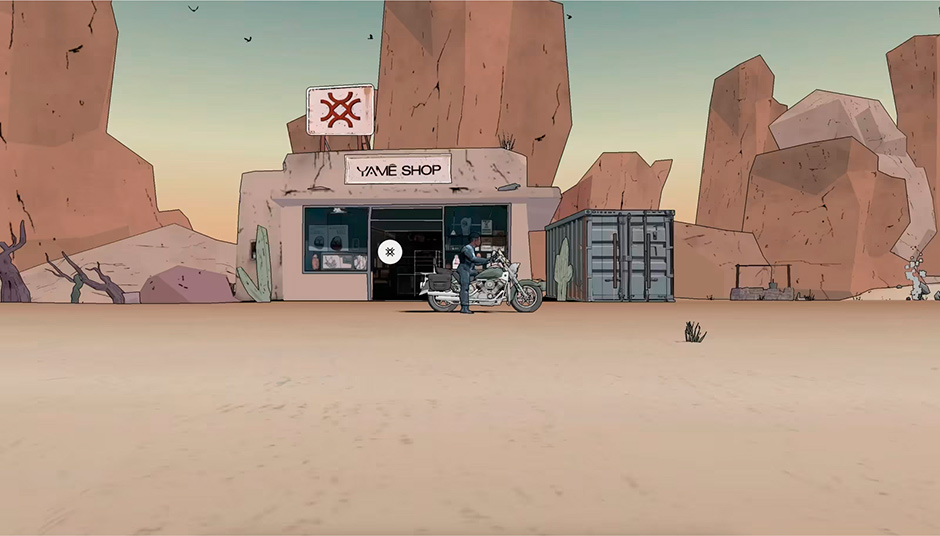
Yamê came to us with the overall concept: a rotating platform on which his “bike” avatar rides a motorcycle. Here, it’s the background that scrolls, much like the website www.joshuas.world. The landscapes shift and vary, echoing the different universes featured in the short film—desert, forest, palace, and more. We coordinated with Mathematics, who had already been working on the creative boards of the film with Yamê, to ensure our environments matched seamlessly with theirs.
Coordinating content, 2D design & interactive features
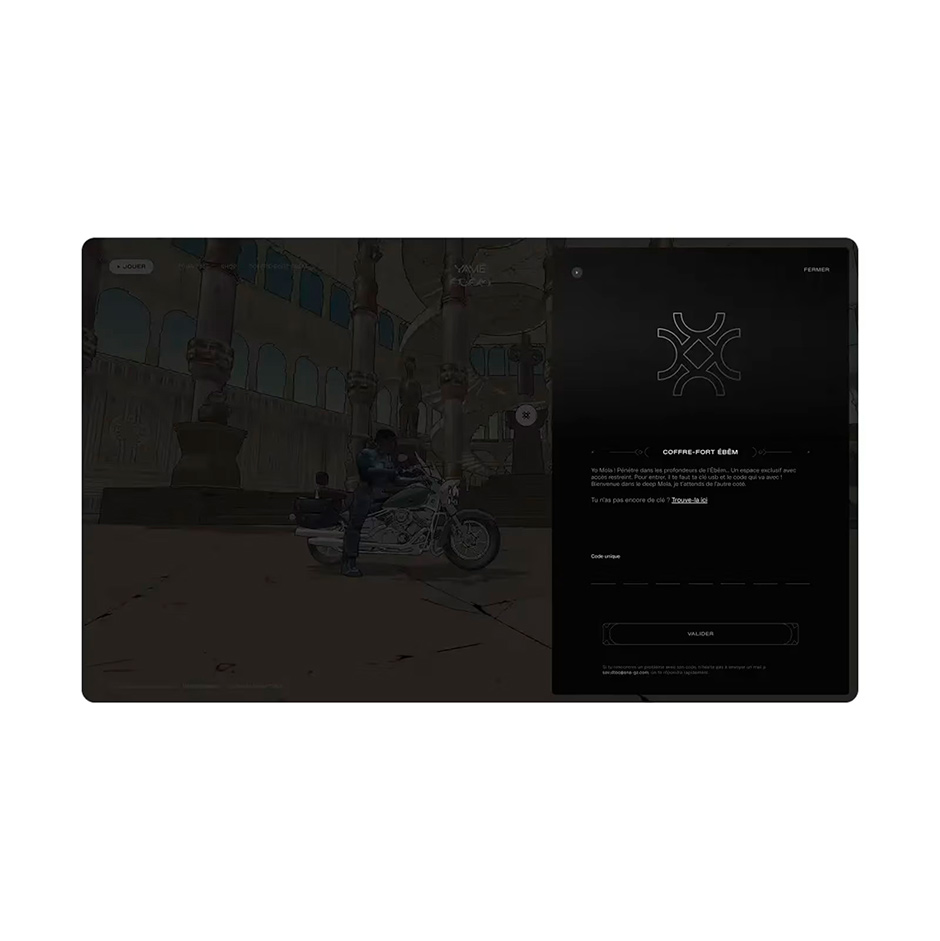
Designed as an evolving space, the website regularly offers new content, with its setting adapting accordingly. It serves several complementary purposes. First, it showcases a variety of content dedicated to the Ebem album. It also provides a secure area accessible only to holders of the collector’s key. In addition, it invites users to hop on Yamê’s bike through an interactive mini-game. Finally, it hides a few extra surprises with easter eggs concealed within the environment.
3D design and texturing
All the environments were created in Blender by the studio. The inspiration boards from Mathematics’ film served as a foundation, after which Hugo Maury (senior designer) produced boards for each universe, along with the objects that compose them. These elements (sets placed on the platform and background objects) were then modeled in 3D by Thomas (junior designer) and textured by both Hugo and Thomas.
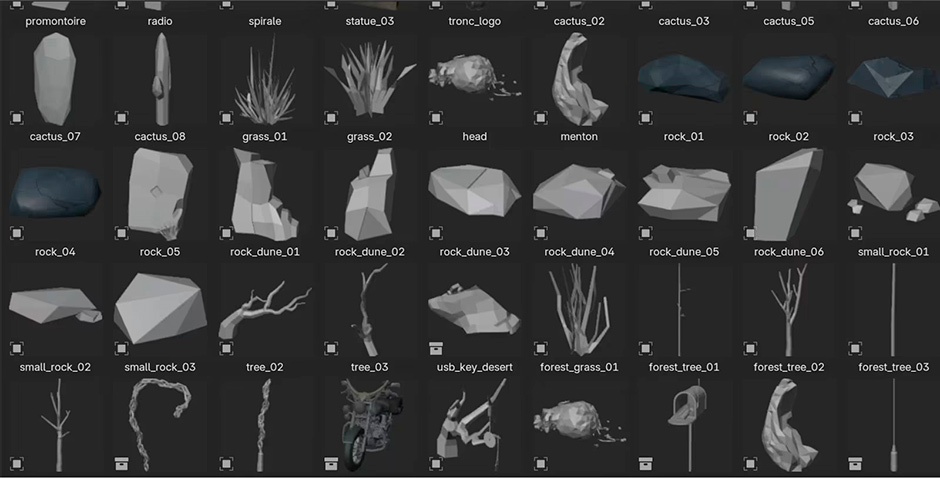
From 3D modeling to scene integration
In this project, the entire 3D pipeline revolved around three inseparable pillars: object modeling, texturing, and integration within a single scene. The goal was to establish a smooth process, enabling each collaborator to work in parallel on their own assets and integrate their updates without risking conflicts in the working files—thus allowing for faster iteration.
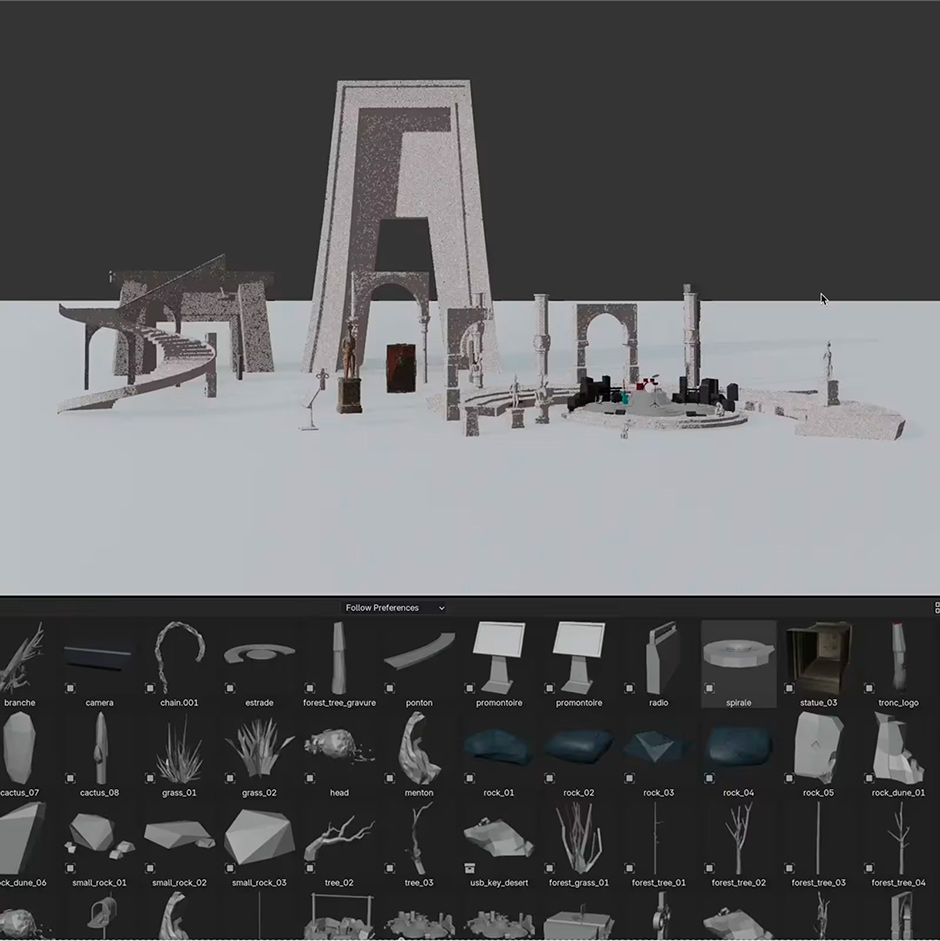
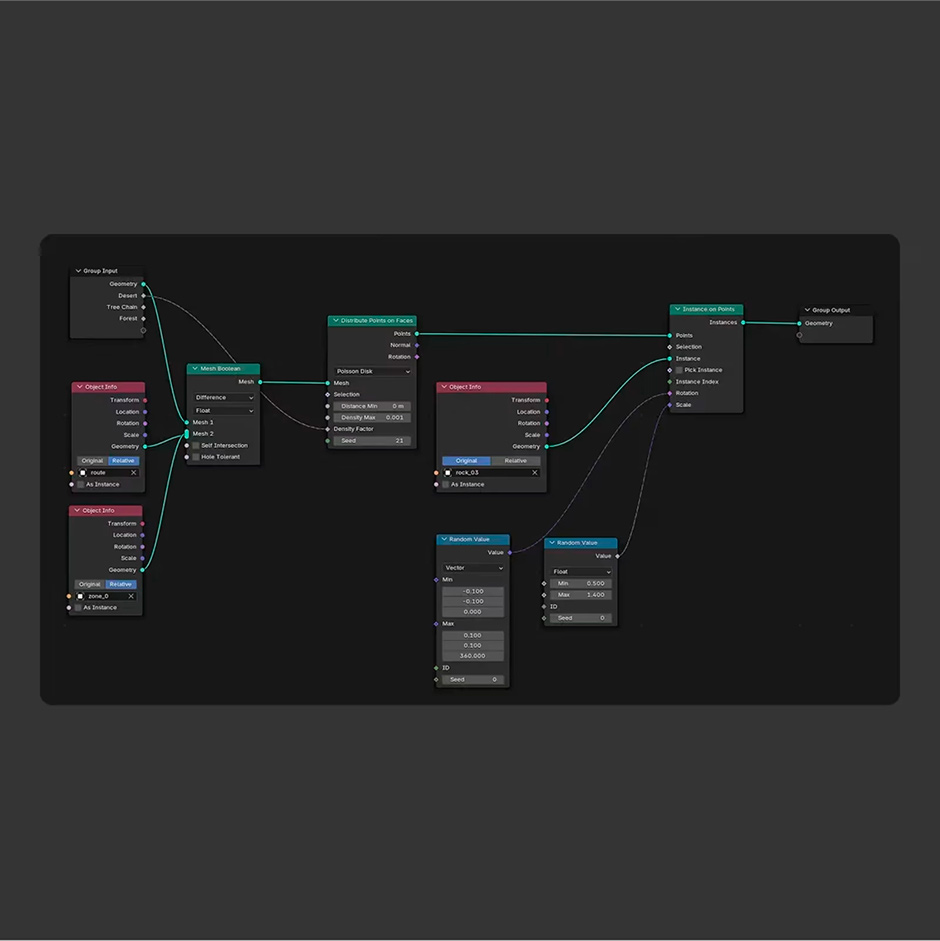
Scene composition and instances
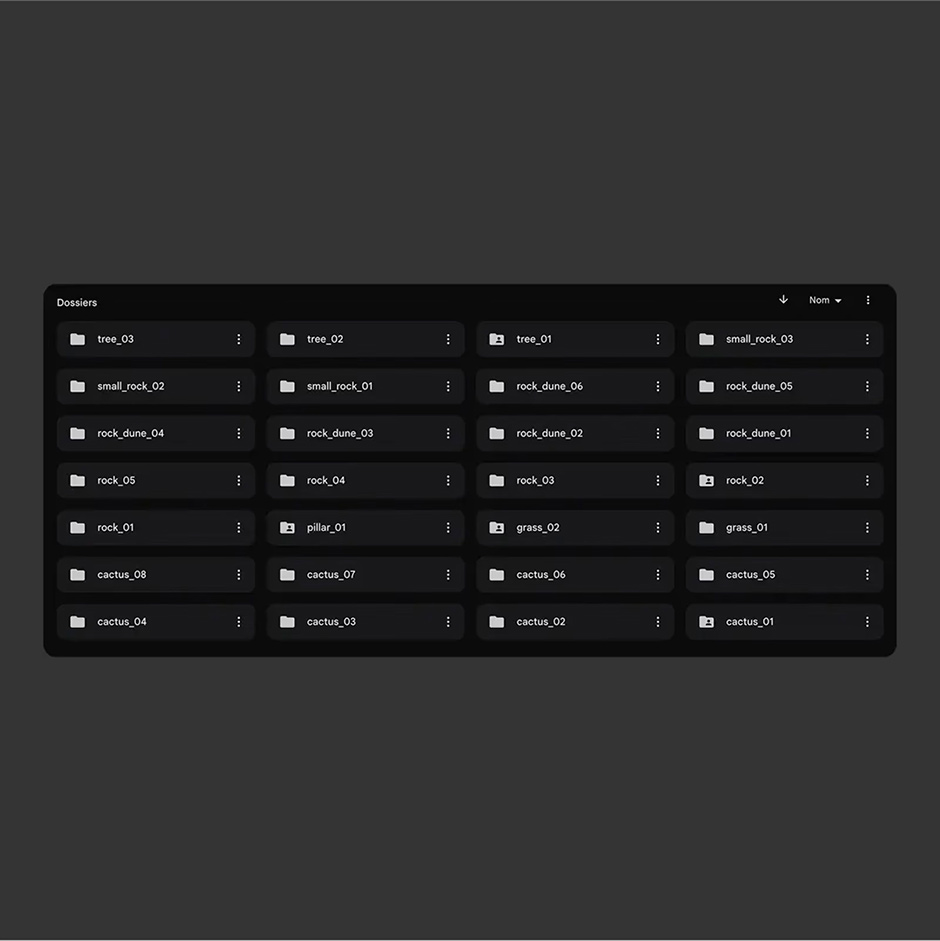
The main scene, also versioned separately, contains only one unique design element: the organic shape of the ground. Large volumes (buildings, structures, bulky furniture) are imported from the Asset Manager, manually positioned, and then grouped by type under empties (null objects). Each group shares the same geometry, allowing these objects to be exported as instances.
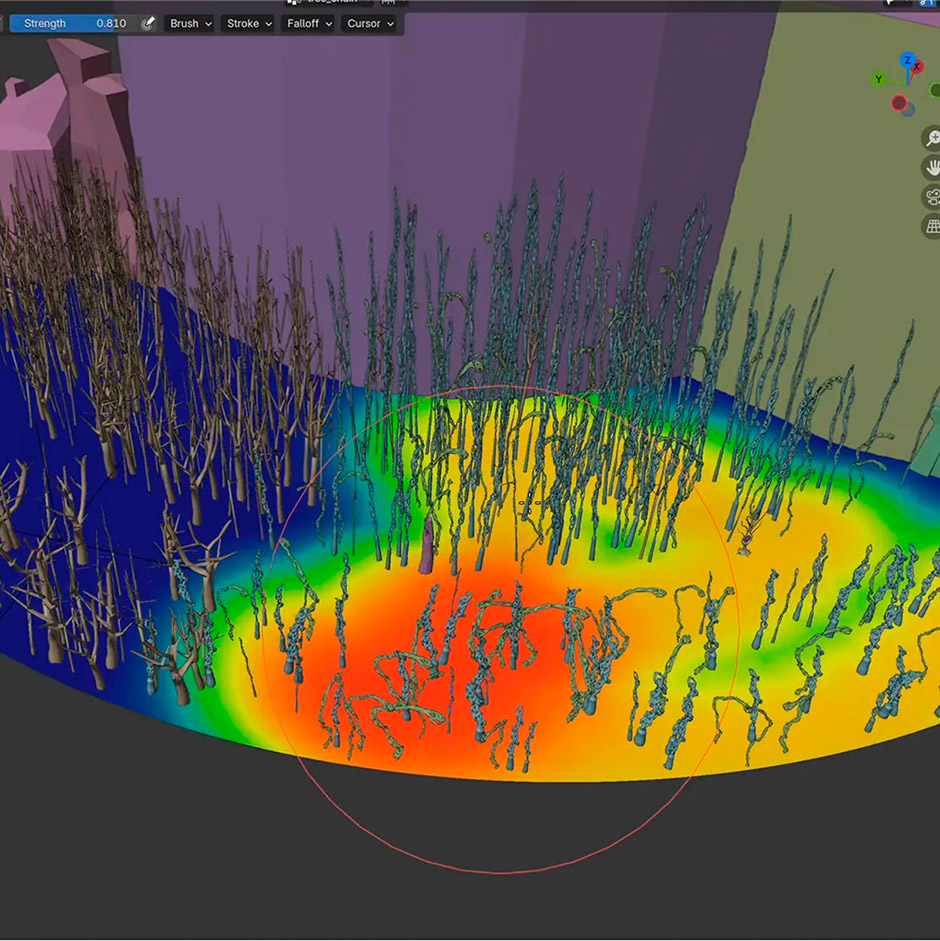
To populate the scene with smaller assets (rocks, plants, props), we use a different approach: the ground surface is duplicated as many times as there are assets, with each copy becoming the input for a Geometry Node. Using a Mesh Boolean operator, we remove the areas of the ground where no instances should appear, then, with a weight-paint texture, we paint the exact zones where instances should spawn. The Geometry Node reads this density data and distributes the instances across the ground surface.
Update cycle
Whenever an asset evolves (shape, UVs, textures), the designer updates it in their dedicated file and uploads the new version to the drive. In the main scene, a simple “Link Object Data” is enough to bring in the updated geometry and resources—without affecting the rest of the composition or creating version conflicts.
Final export and optimization
For the export, we chose the GLB format while keeping the “Geometry Node Instance” option enabled. In post-processing, gilt-pipeline is used to:
- compress the geometry with DRACO
- convert the textures to KTX
The final output weighs less than 7 MB, ensuring fast loading times and smooth performance in WebGL.
Development
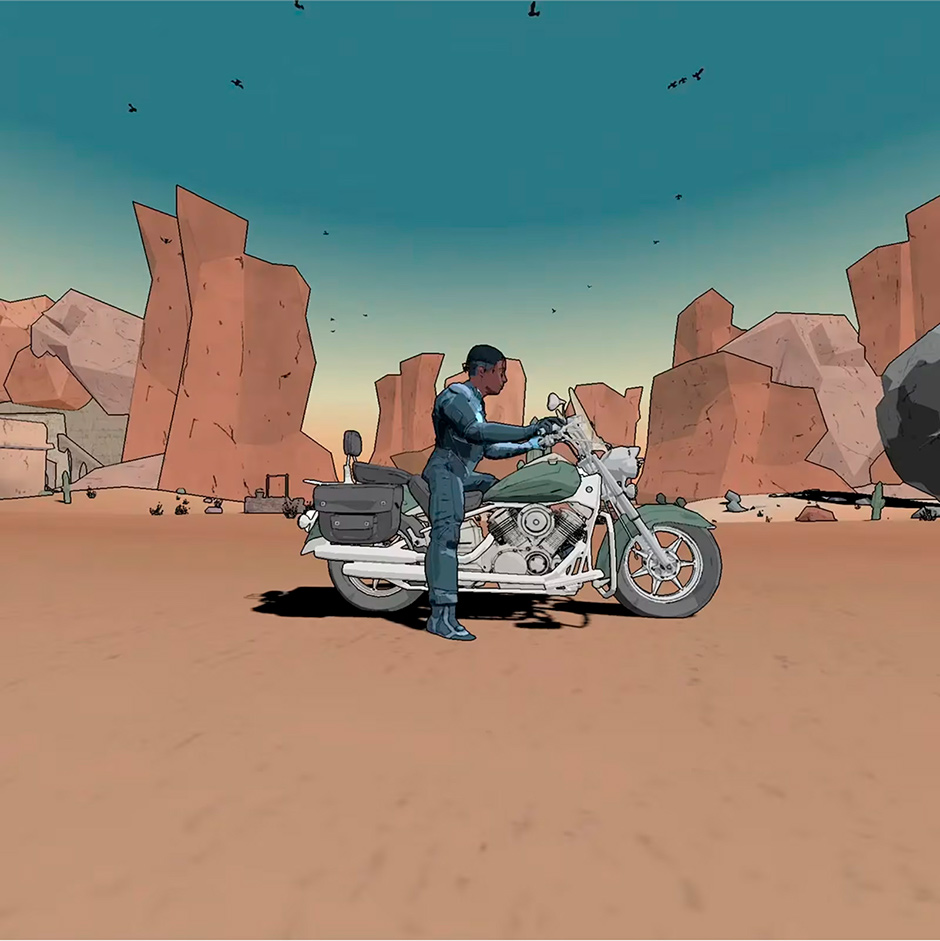
The art direction is based on a graphic style close to comic/cartoon. To achieve this look, several techniques are usually combined.
Shadow thresholding simplifies dark areas, while contour lines highlight the main shapes. Finally, adding texture effects enriches the whole and gives it greater depth.
Shadow thresholding
Shadow thresholding is quite straightforward: THREE.js handles it automatically with the MeshToonMaterial. The principle is to sample the shading—that is, the variations in brightness when light hits a surface from different angles—and then group all those nuances into just a few colors (usually 3 to 5).
This shader came with a limitation: it didn’t allow us to define the colors of the lit and shaded areas separately.
By default, THREE.js uses two components:
- "color" (or albedo): the color diffused by the light
- "emissive": the color the material emits on it
These two are simply added together in the render.
So, we modified the shader to:
- set irradiance thresholds
- freely interpolate intermediate colors based on light exposure
Result: on the left, the default render where all textures share the same tones; on the right, the modified render, which lets us manually shift the hue depending on light exposure.
Outline Rendering
This step is essential in toon rendering: outlines not only evoke comic book aesthetics but also help distinguish volumes that tend to become less visible due to flat color shading. To define these outlines, we combine two techniques. First, a graphic texturing applied directly within the textures adds relief and roughness inside each volume. Then, a post-processing outline pass helps separate the different volumes from one another.
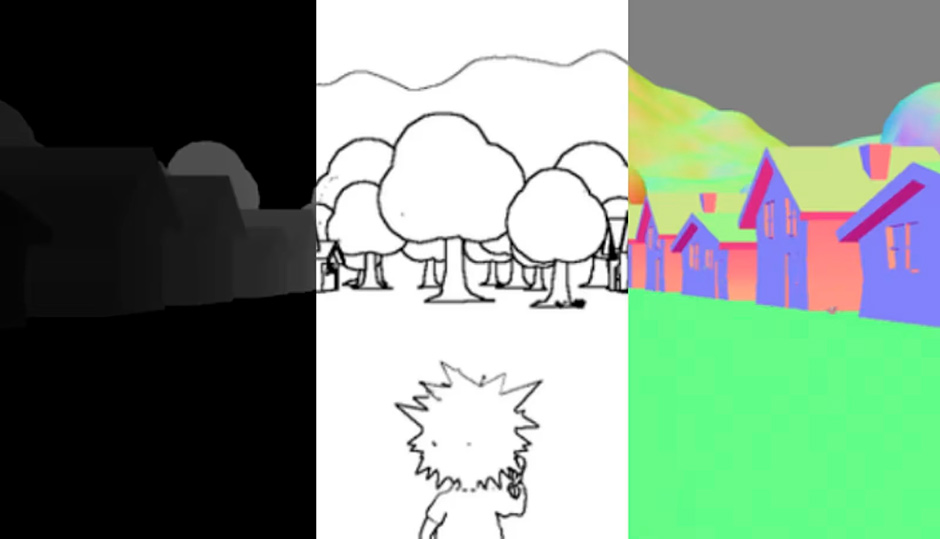
For this second part, we rely on an edge-detection algorithm such as Sobel. It works with a convolution matrix that enhances differences at pixel borders: for each pixel in an image, the algorithm examines its immediate neighbors, and the stronger the contrast, the more intense the resulting pixel becomes. In short, this filter acts as a contrast revealer. By applying and combining this technique to specific render outputs—such as a normal texture (left image) or a depth texture (center image)—we can highlight the contours of certain objects.
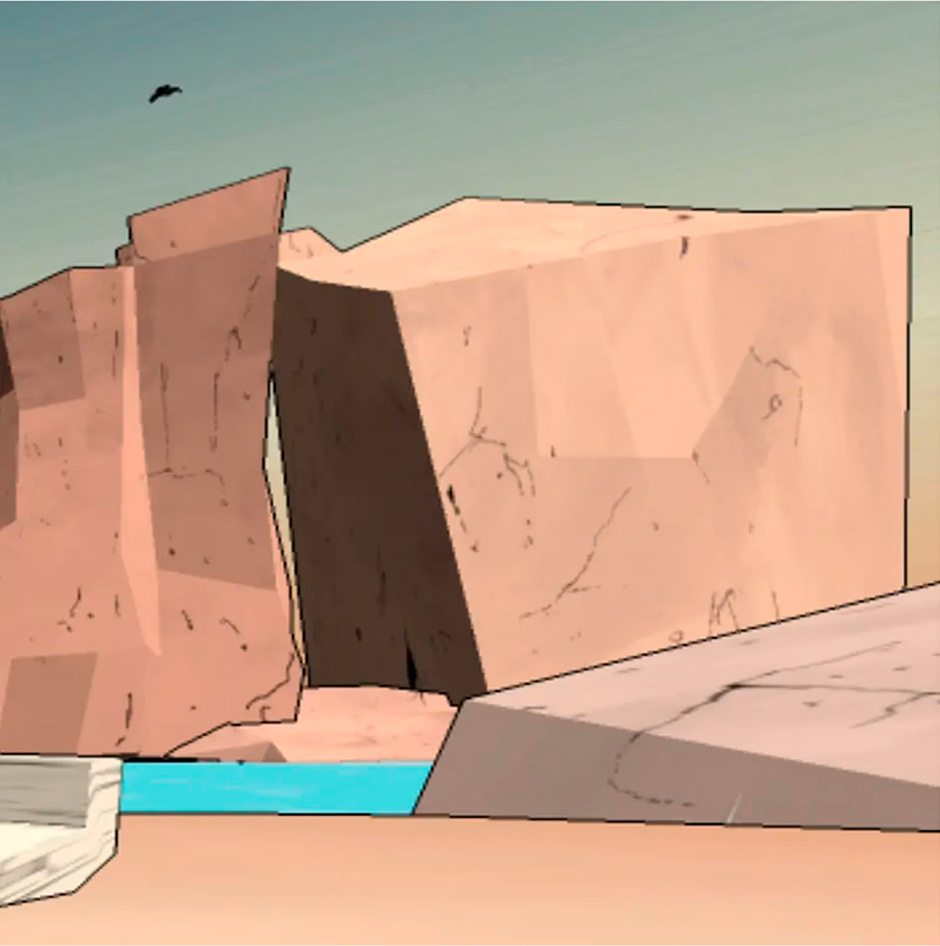
This method generally works well but can sometimes create unwanted artifacts. For example, when the faces of different objects are aligned just behind one another (with only a slight depth difference) and share the same orientation (identical face direction), the differences are not pronounced enough. In such cases, the contrast is too weak, and the outline fails to appear.
To solve this issue, we assigned a unique color to each entity whose contours we wanted to reveal. A deterministic algorithm distributes colors in a way that maximizes their distance from one another, and each object is given one of these distinct colors.

Company Info
We are Studio 9P, a studio that designs and builds web-based adventures.