Following the award-winning first edition of 2020, Foam and Build in Amsterdam created a brand new online exhibition which showcases the work of 20 artists, selected through the annual Foam Talent Call.
Their projects are translated into the digital realm, supported by audio, video and interactive elements. Liberating the photographs from their frames and taking them beyond the museum walls, the exhibition pushes the boundaries of the medium and explores the outlines of its future form. Visitors are invited to explore & immerse themselves in the endless possibilities and perspectives that contemporary photography has to offer.
A curatorial process
On Foam Talent, content is the main eye-catcher, therefore we minimized the interface to purely support the artworks and even let it disappear when necessary. We never cropped any visuals and we made use of the whole width and height of the screen to let the visuals speak.
Each page layout & image reveal animation is unique, tailored to each artist’s body of work.
We have worked on the design and motion in close collaboration with Foam curator Hinde Haest and the artists themselves to ensure the results were in line with their work and expectations.
Accommodating the atmosphere and tone of each artist’s project was a real challenge. With a limited amount of intervention (layout, colours, reveal animation, captions…) we had to express different ambiances and feelings. Some projects have an organic, collage-approach like Neuromantic, while others are following one sequential storyline like Extendable Ears.
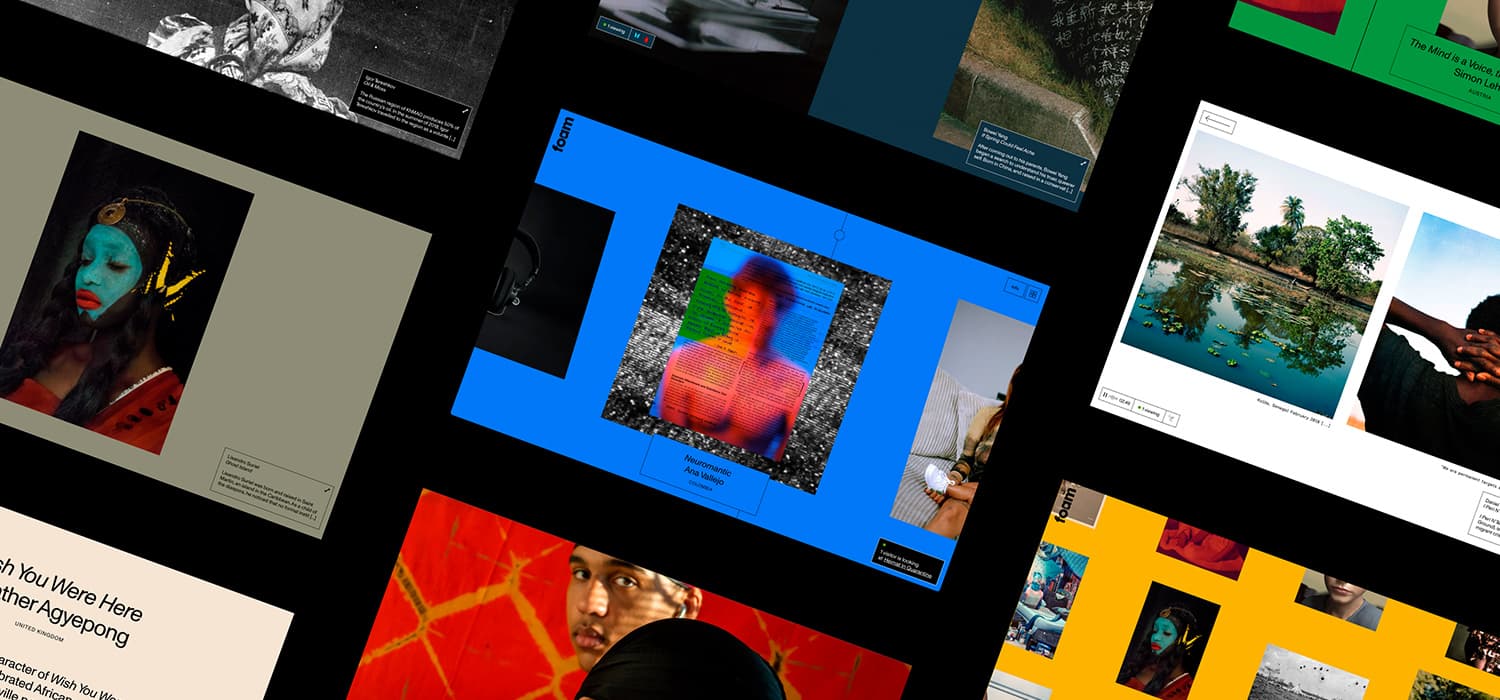
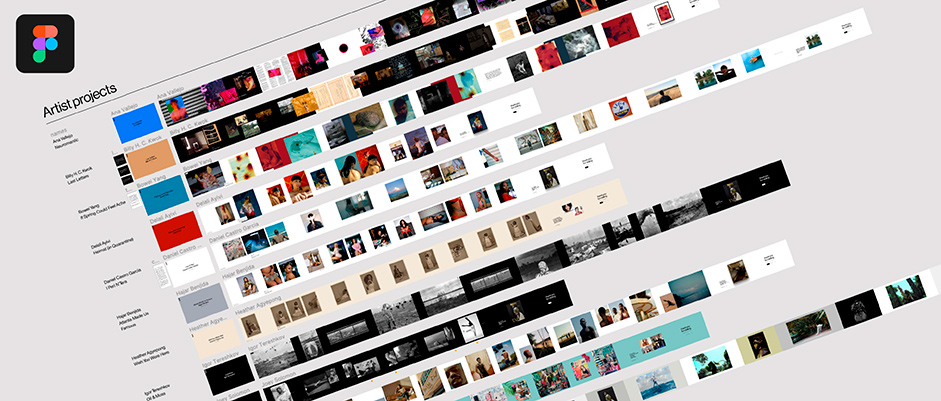
Portfolios
Emotional browsing & suggestive presence
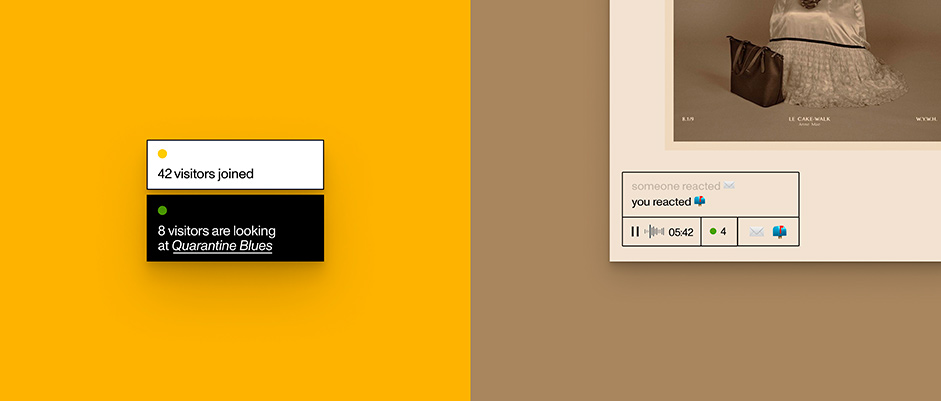
Our guiding concept was to bring emotion to the browsing experience like we have done for the 2020 edition. However this year we wanted to add an extra layer by also suggesting the presence of other visitors without it being too literal.
We decided on creating two exploratory spaces where visitors can choose where to start, a bit like wandering between the walls of Foam and not always following the recommended path. A horizontal scroll emulates the walls of an exhibition space while the open grid enables a more fluttering navigation pattern.
We were inspired by how visitors can be drawn to a room just by seeing other people already in there. This resulted in the creation of a visitor counter and live interactions, which indicate what projects are other people viewing in a little notification format and the possibility to react with various emojis linked to the projects.
The way it works; we use a React hook that consumes a Serverless API endpoint every 10 seconds. Furthermore, it posts to that same endpoint the page that you are visiting, the action (whether you leave or enter) and your unique id as a visitor. We used the help of isReady and asPath of Next.js useRouter hook to be able to know what page the user is visiting, and when the route is ready, to execute the code.
After the user leaves the page, it clears and stops, making it reusable and extremely performant.
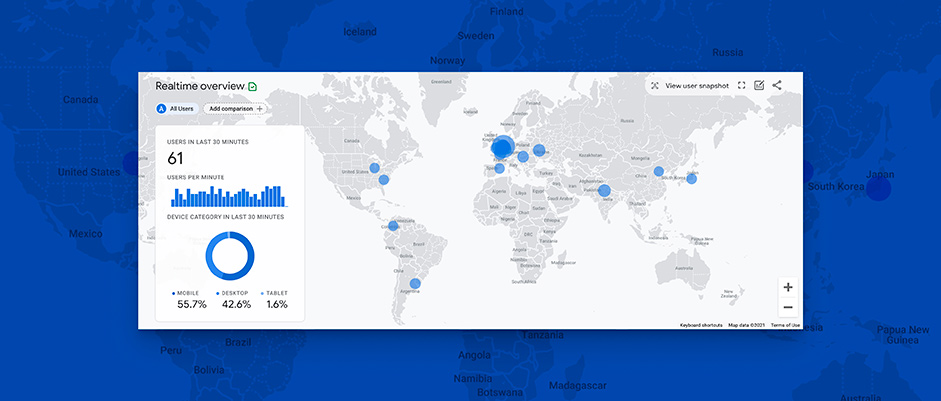
Global reach during an isolating pandemic
One ‘side-effect’ of global lockdowns is that more people than ever before were able to visit the Foam Talent exhibition which is usually a physical touring exhibition (London, New-York, Berlin, etc.). Having a fully digital version enables a true global reach, as these Google Analytics real time screenshots shows:
The digital exhibition will be shown as a hybrid installation in the physical museum Foam in December! It is also part of a larger Foam Talent program which started in August and manifested itself as a series of online talks, events, guided tours of the website, etc.
Technologies
From a technological point of view at Build in Amsterdam we absolutely love our main Stack; Next.js and Vercel which offers an incredible synergy, performance and fluid setup for developers.
We chose Storyblok as our content management system. We were using it for the first time & it exceeded our expectations. Its adaptable setup, quick modifications, variable components and live preview matched our requirements flawlessly.
The project also included complex and interpolated animations. We chose Framer Motion because it is second to none when it comes to animating between states and routes.
Switching views with Framer Motion
As mentioned earlier, it is possible to browse the Foam Talent exhibition in a horizontal and a grid view. We kept both views as simple as possible yet powerful. It was mandatory that the number of elements stays the same since this would help us to create the animation explained below.
Framer Motion is one of the most powerful animation libraries for React. One of the things that make it so powerful is the ability to animate between views. To achieve this we need to do two things: convert our HTML elements to motion elements and wrap everything with the AnimateSharedLayout component.
We also have a boolean state to show or hide each view in case Grid View is on or off. But how does Framer Motion know that the elements are related? We just need the last element, add a layout id to the motion elements like so:

And that's it! Now Framer knows that elements with the same layout id are related and will interpolate the elements once the state is changed. Try it and see the magic happen ✨.
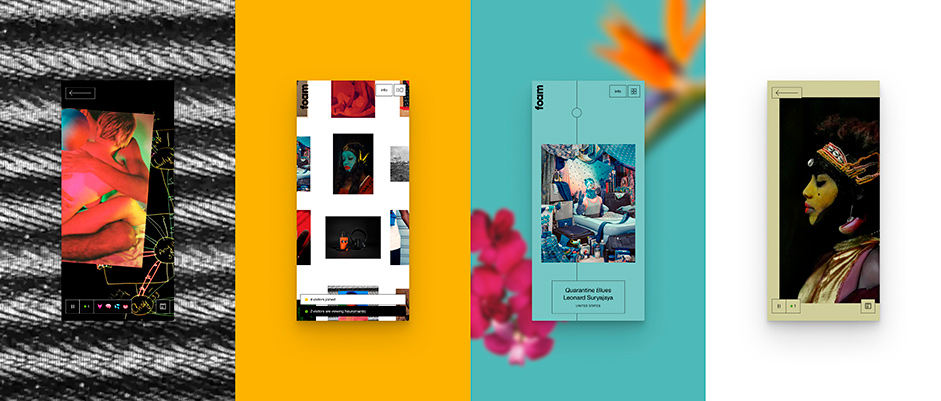
Project pages
We felt deeply connected to all the artist projects and wanted to offer something truly unique and special for each one of them. We really wanted to translate that into code in a clear, intuitive and simple way. This is where our ‘position utility’ comes to action and gives us all the flexibility and creativity that we need.
We felt deeply connected to all the artist projects and wanted to offer something truly unique and special for each one of them.
In our code, we have an absolute position utility that can receive different values like width, left, top. In Storyblok, we created a Component where we can input those values directly from Figma. We then have a styled component that receives those values and is then processed by the position utility to use it as CSS properties. But now what? How do we know where to position the elements?
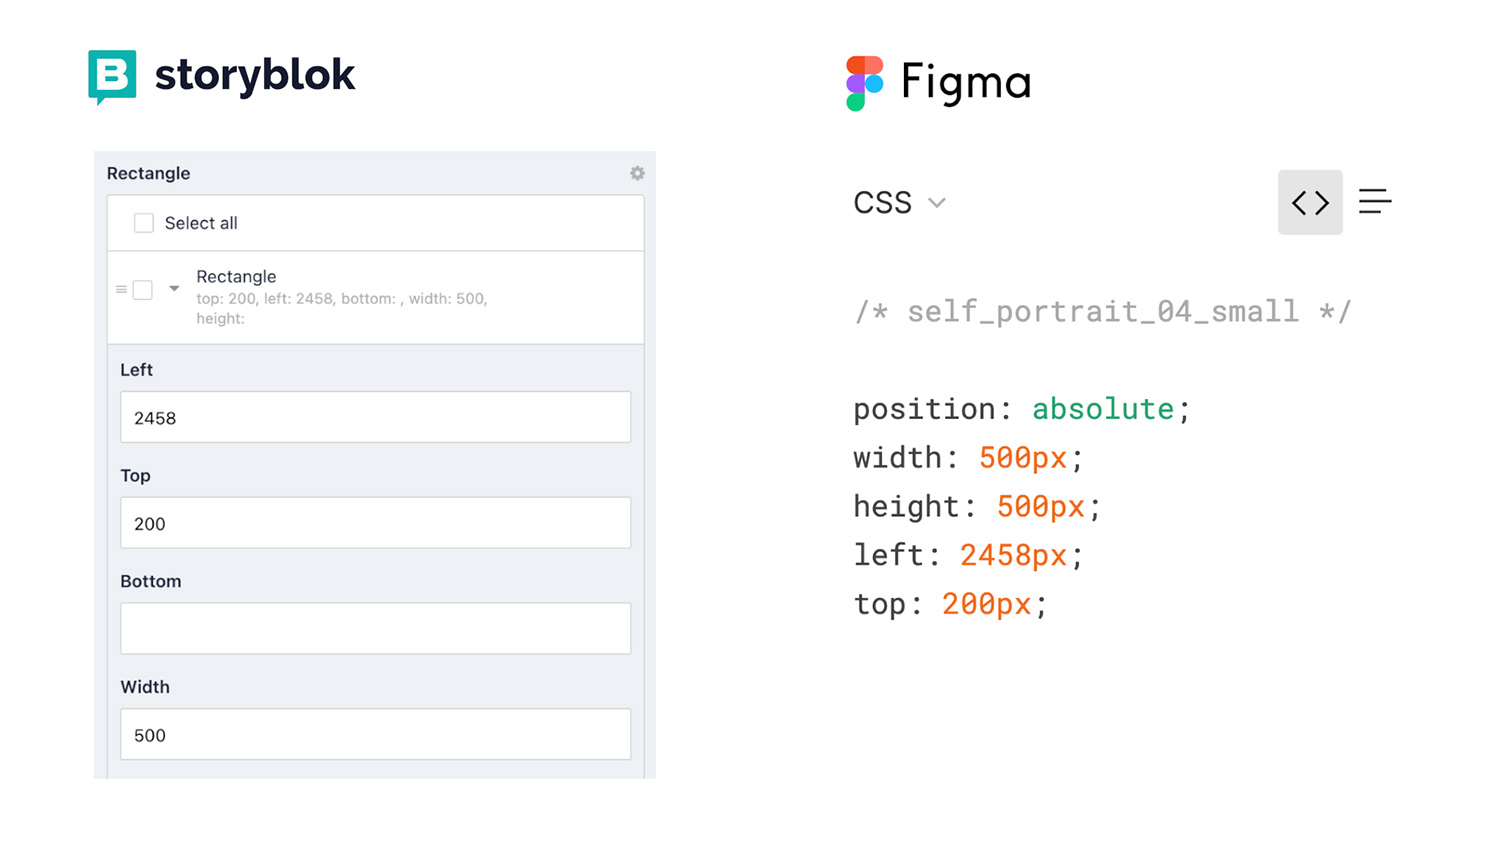
Our utility takes as a reference the height of the Figma file and converts all the received values to values strictly related to the view height of the screen, making them responsive and equal to the Figma file; the dream of any designer 🤤.
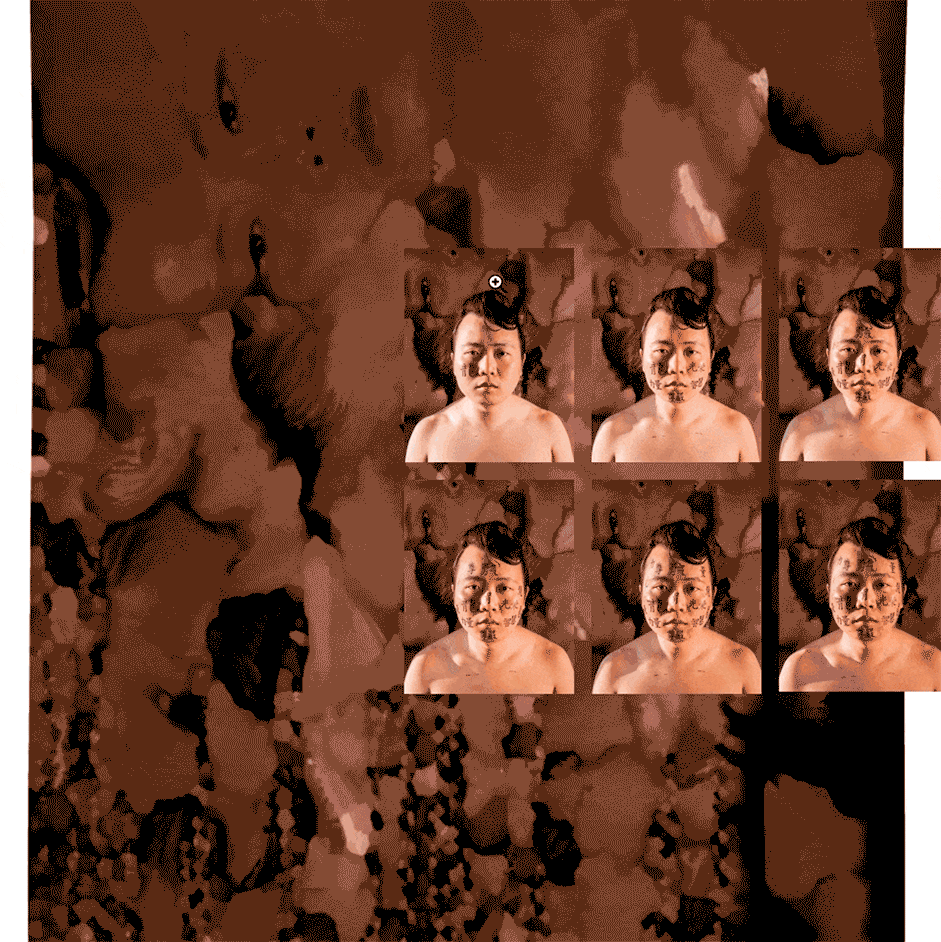
Tommy Kha’s portfolio
We feel really proud of how all the projects came to be, but one that really shows off what can be done with the setup is Thommy Kha's project page. It has components of all sorts; images, videos, even its own draggable heads, but without doubt, one to highlight is the 3D cloth that we did with React Three Fiber (React renderer of Three.js ) to resemble his real artwork called Reunification:
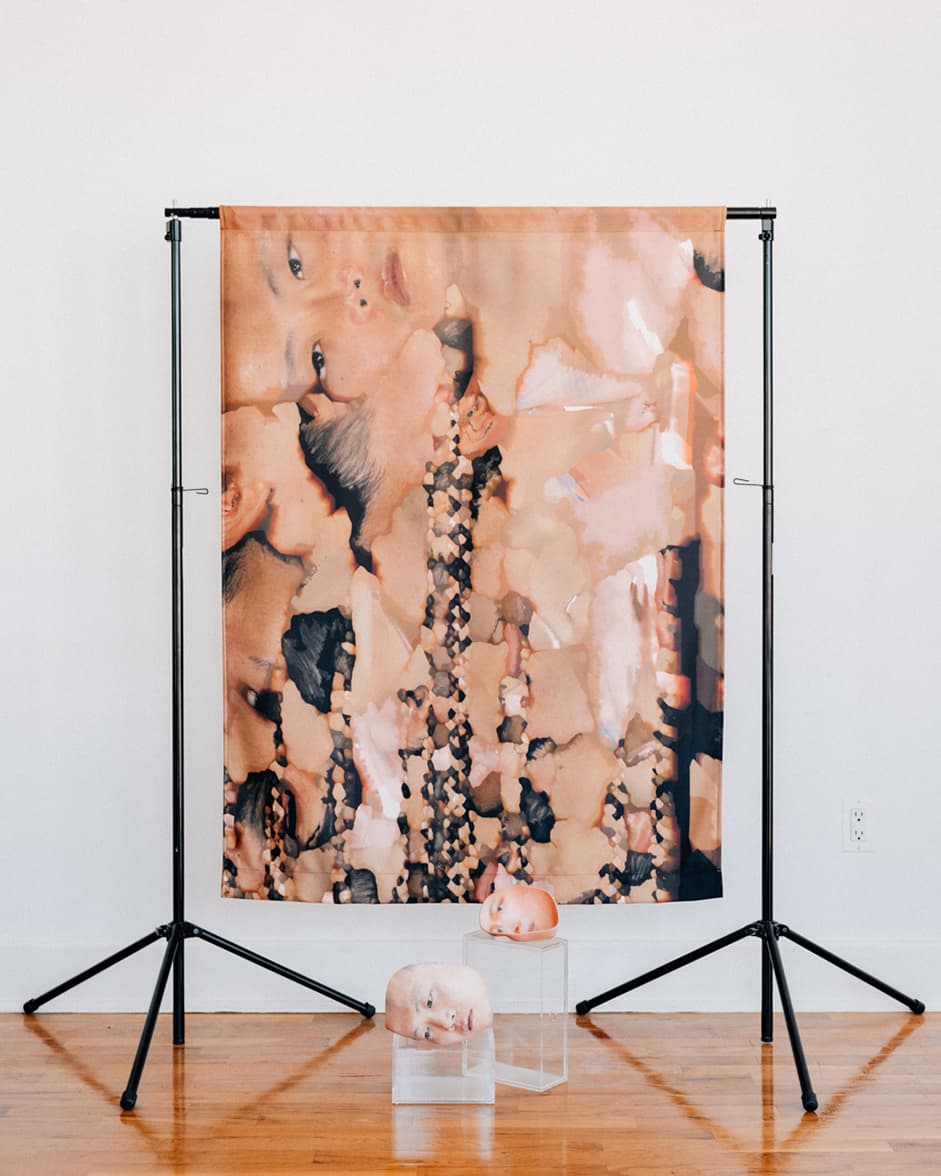
Obviously, this could not have been achieved without his willingness & bravery to let it happen, so from here, now that we have the chance, we will like to thank you Tommy 🙏 .
Optimisations & performance:
Having in mind that we were working with so many high-quality images we needed to find a way to get the maximum quality pictures with the least size possible. That is why we used Next.js. Image component and hosted the project on Vercel which offers asset compression, automatic swapping and format conversion, a customizable Srcset prop that adapts to all your needs and an incredible first paint speed.
Beforehand, we used Squoosh App to reduce that size even more, and in some cases, we reduced up to 90% of the picture size with only a 5% loss!
Tools
Frontend:
WebGL, Three.js, React, Framer Motion, Next.js
Backend:
Next.js, Vercel, Storyblok
Design:
Figma, Squoosh
Credits
BiA team:
Development: Eduard Fossas, Maikel van der Zande
Design: Margot Gabel, Daan Klaver
Management: Karla Vincheva, Tim Weers
Foam team:
Hinde Haest, Laurel Harple
About Build in Amsterdam
Build in Amsterdam is a branding and development agency specialised in digital flagship stores. We believe our industry is blinded by numbers, while buying decisions are based on emotion. By combining strategy, branding & e-commerce, we build digital flagship stores that go beyond logic & redefine conversion. We bridge the gap between on- and offline touch points.