Massive congratulations to Lusion for winning Site of the Month May with their first official studio website! Coming up they share the making of their awesome interactive WebGL experience. If you voted, thank you, see the winner of the directory plan at the end of the article.
Lusion is a small digital studio focussed on real-time animations. This is our first official studio website, which took us on-and-off roughly a year to complete while we juggled the day-to-day of establishing a new studio during its first year. It’s one of our proudest achievements to date.
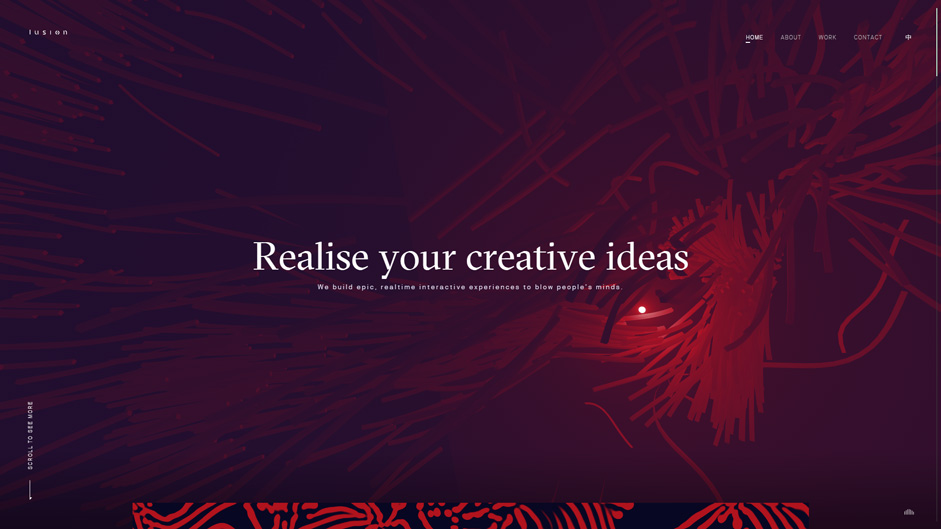
We build epic, real-time, interactive experiences to blow people’s minds
It’s clear to most that we are developers at heart. The rationale behind our design choices was relatively simple: to create something fun for ourselves as well as being able to demonstrate our technical knowledge. We thought that if we decided on being in vogue by using a gorgeously minimalist design theme, it may not give us the freedom in the creative and technical aspects of our website as we would like in order to emotionally engage our audience with our studio’s identity - we build epic, real-time, interactive experiences to blow people’s minds.
The technical side
There were plenty of beautifully crafted WebGL experiences in the market already. In order to “wow” our visually-well-spoiled audiences, we had to think of something innovative, elegant and high fidelity visual effects to add into our studio website.
There is an area of real-time graphics applications, especially for the web, which is pretty much untouched in our opinion - which is customised assets. If we were building our website using the traditional design workflow: creatives -> design -> development. The “assets” preparation we are talking about here for a 3D website would probably be a 3D designer creating some 3D models and then the real-time graphics developers implementing these 3d models in different shading for the 3D environment and that’s it!
However, if the design team and the development team work together, they can do something far better than that! In our case, every single visual on our website uses some custom assets in order to maximise the creatives.
For example: The interactive cloth simulation on the homepage was pre-calculated in Houdini FX. In Houdini FX, we used a finger-like geometry dragging on the cloth to simulate 4 different directions and stored the simulation results into one ArrayBuffer and then in the real-time application, we blended the values based on the dynamic user interactions. Obviously, the results do not look as perfect as a proper cloth simulation because there’s a lot of missing information. However, by adding some real-time distortion, the results look somewhat realistic and it only costs 220KB(Gzip) for the ArrayBuffer and a fraction of render budget for the effect.
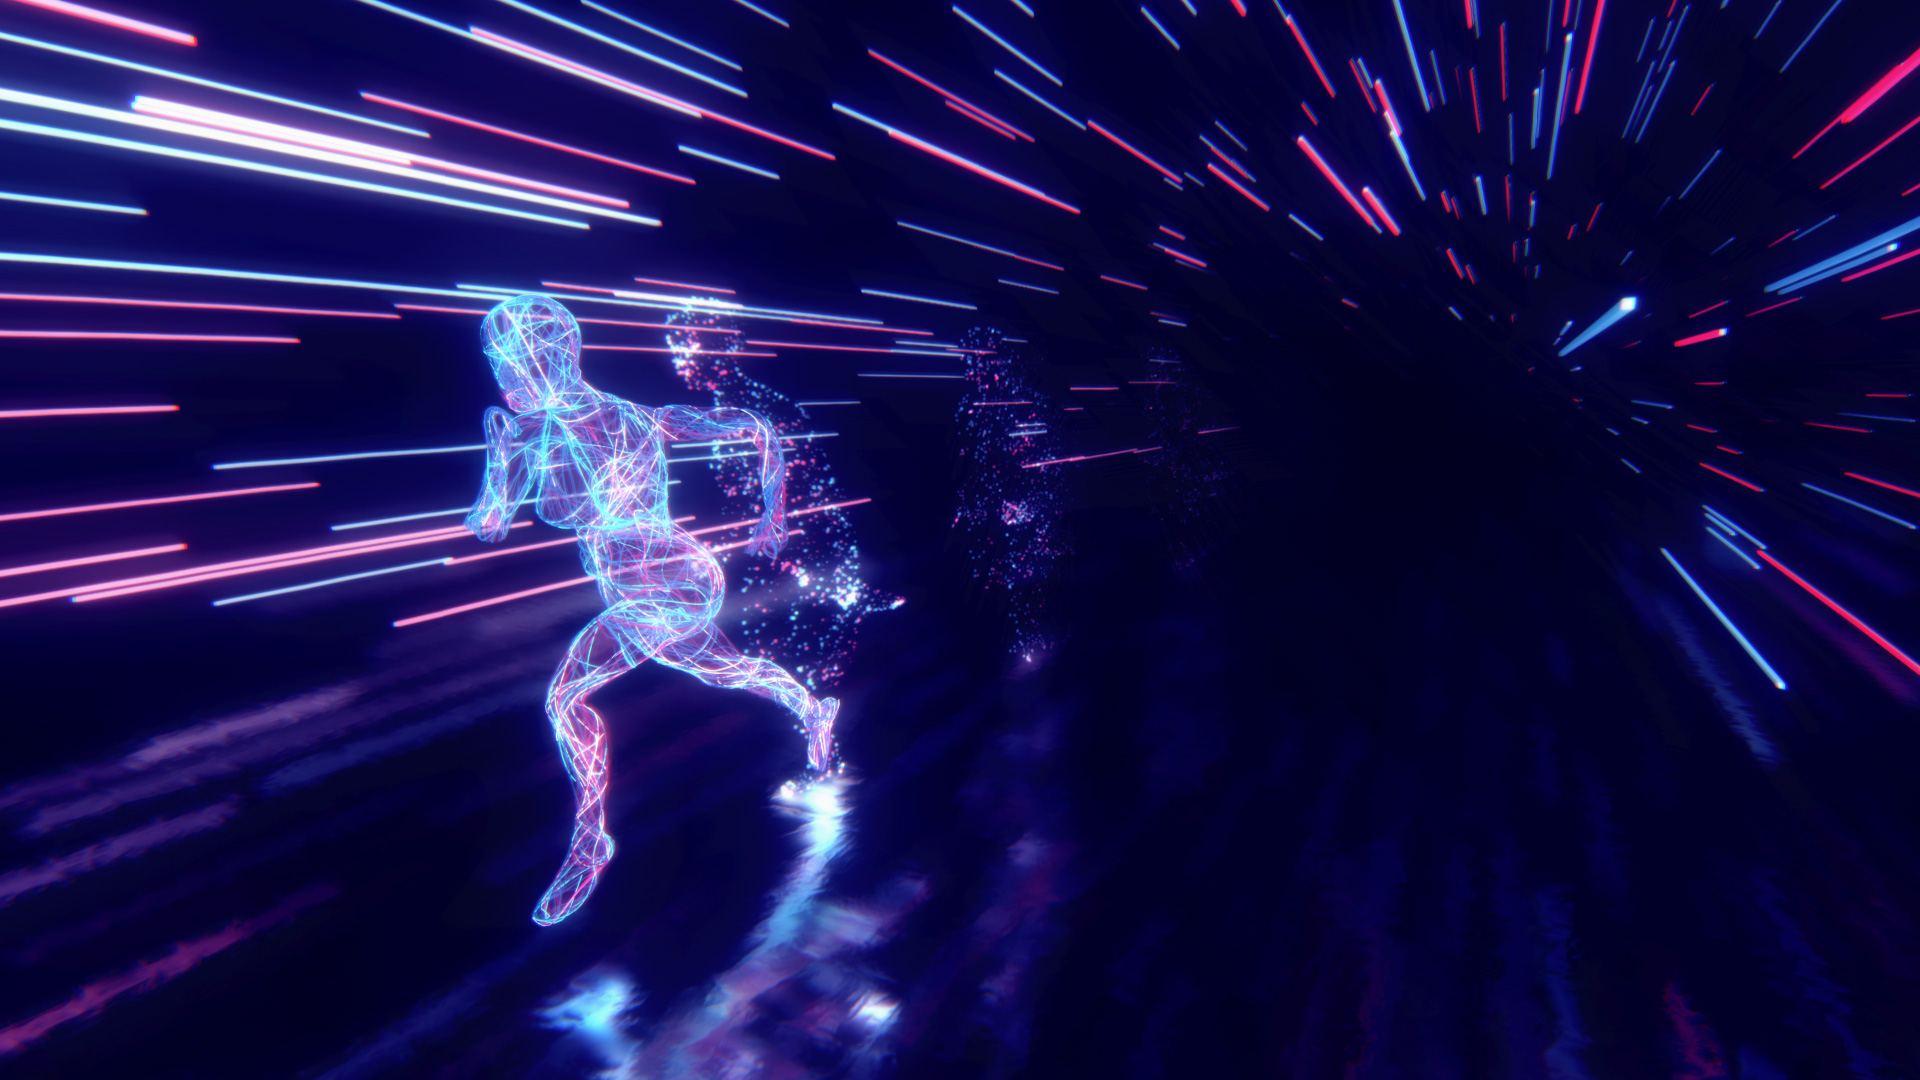
For the contact scene, we used a similar idea by pre-calculating the cloth simulation of the character into 3 directions (Running straight, running to the left and running to the right). But this time instead of storing the values into the ArrayBuffer, we stored them into 2 PNG textures - one for the positions and one for the normals. This allowed the real-time application to assign a specific animation frame to the model dynamically. This technique is called vertex animation. In general, this technique requires a huge data size for the animation. For example, a 1.1 second animated model with 1024 vertices (rather low-ploy already) requires 792KB (1.1 sec * 60 fps * 1,024 vertices * 3 axis * 4 bytes) just for one direction of the position values. On our desktop version, we even used 4,096 vertices for the cloth model so we had to do a bit of optimization:
- Instead of using keyframe for every single frame, we only used 11 keyframes for the total 66 frames animation and we interpolated the values in real-time.
- Instead of storing the value into a 32bit float data, we stored it into a 16bit integer data with a divider which we could use to retrieve the value back in the WebGL Shader.
- Use PNG image for the LZW compression. [Doesn’t use PNG optimization because we need full precision.]
With these optimizations, the file size of the cloth vertex animation including both position and normal values in all 3 directions goes down to 983KB for desktop(4096 vertices) and 246KB for mobile(1024 vertices).
You don’t need to do everything real-time
As well as using customised assets to improve the simulation, we can also use them to improve our real-time rendering quality. For example, in our desktop homepage, there is a Beethoven 3D model, we pre-rendered the normal, ambient-occlusion, thickness and 2 sets of diffused illuminations of the 3D model into an image. Combining with 2 sets of matcap images, we could render a translucent object with 2 different states dynamically.
To push it even further, we also experimented with video assets. In the big screen scene in our homepage, we used the offline rendering engine - Redshift3D to render a simple 3D scene into a high quality static video. Then we exported the camera placement into a JSON file and also saved the 3D scene as GLTF format for real-time rendering. The scene is really simple so it is pretty fast to render and small to download (150KB). In the real-time application, we rendered the 3D scene with a point light following the user’s cursor and we also give the user a bit of freedom to look around with the camera by rotating the camera with a small amount of angle (~1.72 deg).
The tricky part here is to find a way to remap the static video image back to the real-time render: First we needed to match to the exact timestamp between the video and the real-time rendering. Depending on the browser implementation, on some browsers, we couldn’t get the accurate timestamp via video.currentTime. We had to encode the frame counter value in binary into the video and use the `readPixels()` call in WebGL decode the frame counter in real-time. It is rather expensive to run but it was the only universal solution we could think of to hack around it. Then, we could easily get the light information from the video by reprojecting the camera matrix in real-time to the 3D geometries.
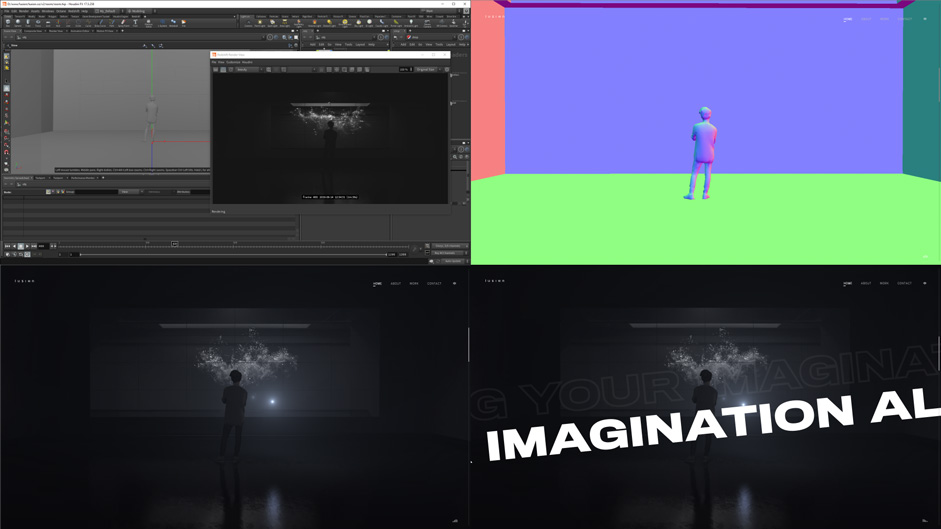
On top of that, adding the real-time reflection, analytical volumetric light, interactive blurry 3D texts, etc., we delivered an interactive 3D scene with high fidelity offline rendering quality visual for our website.
Technologies
Frontend Frameworks and Libraries: Backend Technologies:
We made our site generator in node.js to build the website.
Server Architecture:
The website is purely static.
Tools:
Thanks for all the votes and tweets, the winner of the Pro Plan is @gabduret, please DM us on Twitter to claim your prize!