Designing for people with different types of disability, can be easily forgotten by designers as accessibility tools are not integrated into design platforms like Figma, Sketch or Adobe XD.
Adee is an accessibility tool that works as an extension in Figma and Adobe XD to help designers to test and adjust color contrast, simulate various forms of colorblindness as well as two other newly developed features in Adee that I’ll talk about in this article - the AltText Generator and the Touch Target Size Checker.
Adee Alternative Text Generator:
Although the purpose of alt text is to improve accessibility by explaining what an image is to visitors of the web page who are using screen readers, it also assists search engine crawlers and SEO of your website. Failing to set alt attributes for images means that your website becomes difficult for screen readers and browsers to interpret, and reduces the user experience for visually impaired users [1].
Adee alt text generator is an easy to use tool for designers to create and generate Alt text in Adobe XD and Figma and share it with developers. Here are the steps to follow in Adee to create alternative text:
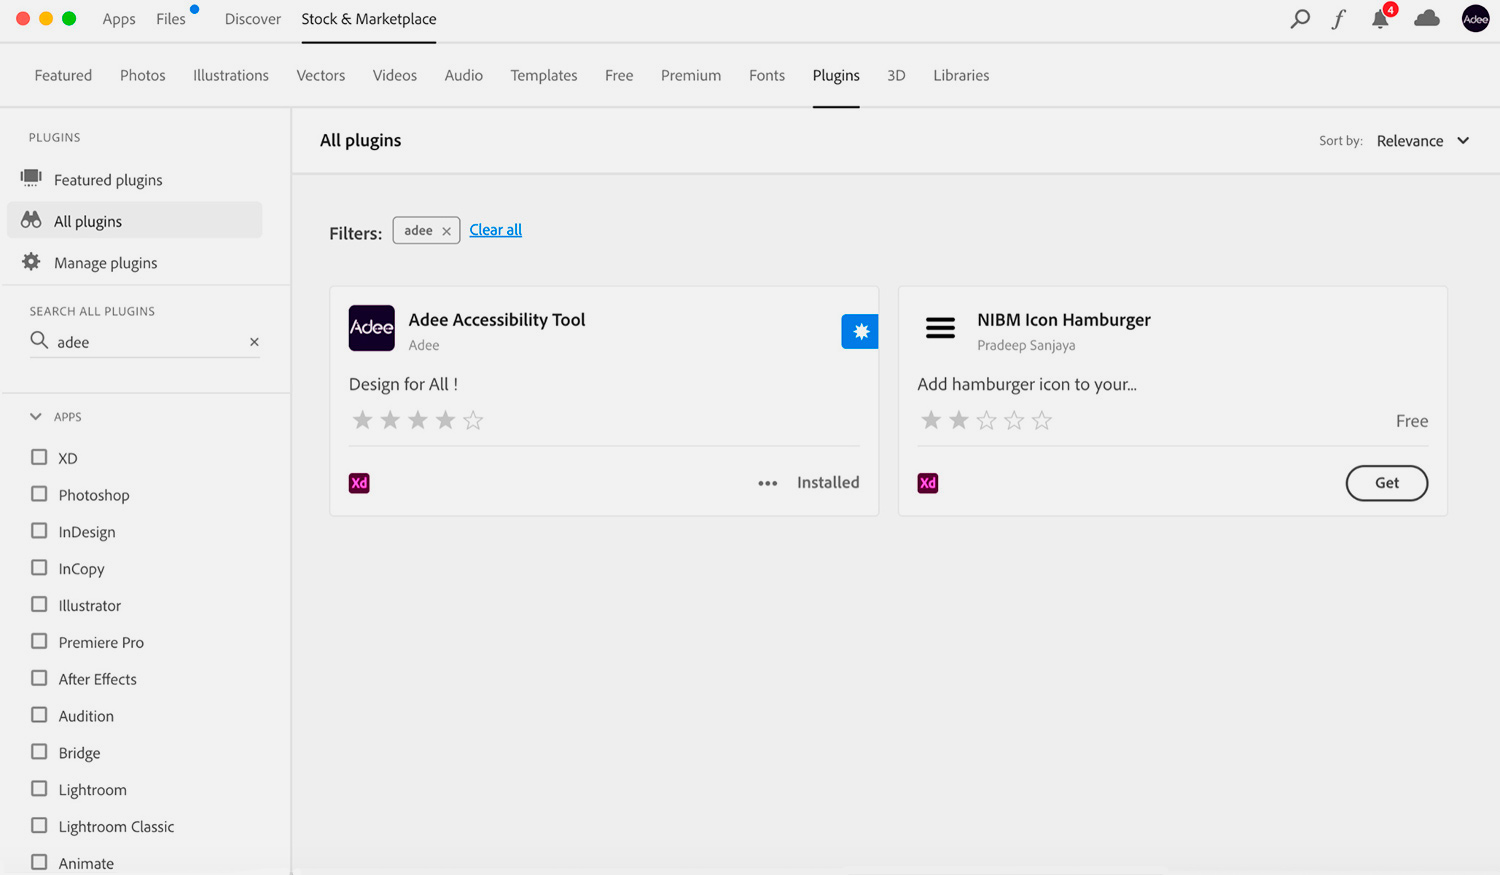
1- Plugin installation
In Figma or Adobe Xd, install Adee from plugins marketplace and then open the Adee plugin from the plugin menu. When opening the Adee plugin, it always appears on the left side of the Adobe XD window.
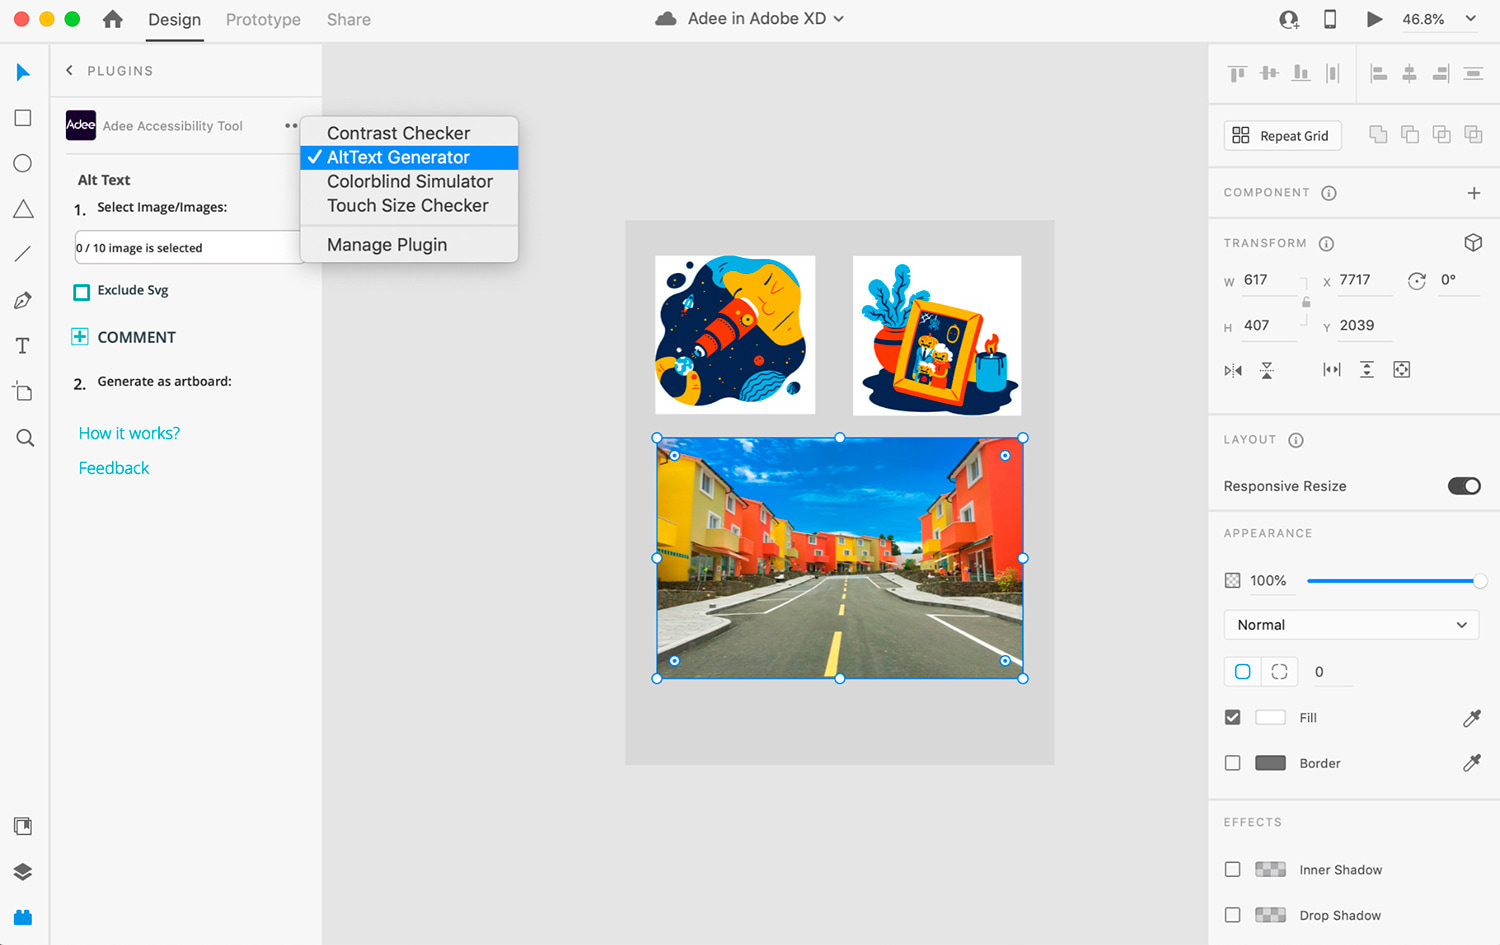
2- Selecting an image:
There are three ways to choose images in the alt text section. (You can only select 10 images at once.)
- Click on any image when the plugin is open and it will show which is the easiest way
- Select your intended image before opening Adee plugin
- Select images from multi-selection field
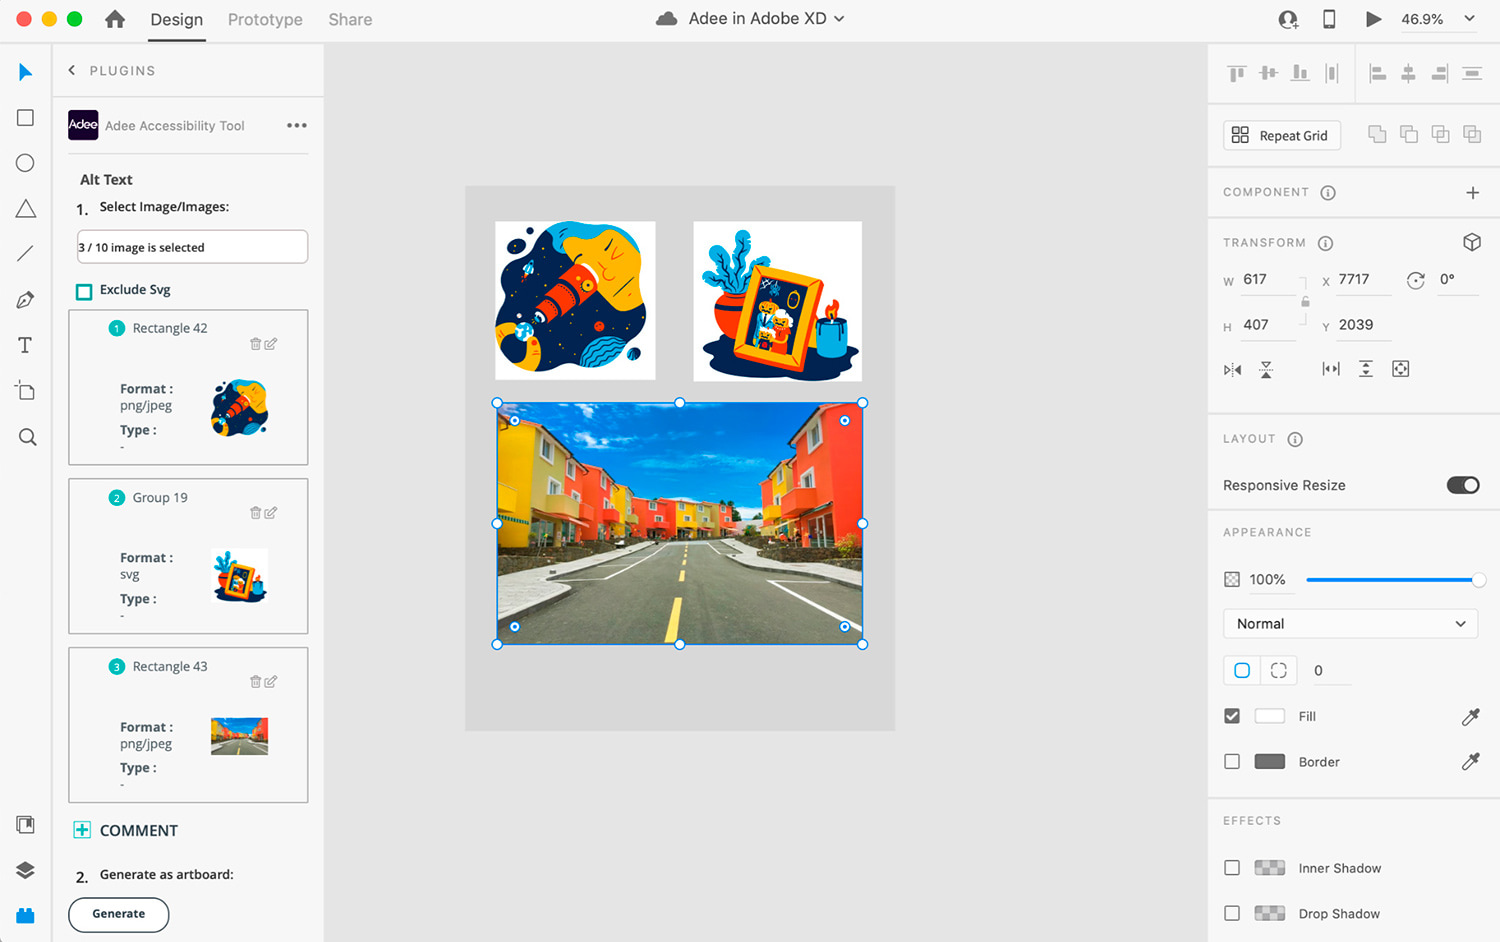
3- Defining Image format and type:
In Adee when an image is selected, it automatically detects and displays the format of the image whether it’s SVG, PNG or JPG. Overall, there are two types of images to consider when creating alternative text, including decorative or informative. Informative images add important information to your webpage while decorative images do not. In the end, this is a judgment that only the designer/author can make. However, Adee provides tooltips and guidance for designers to make a proper decision at each step.
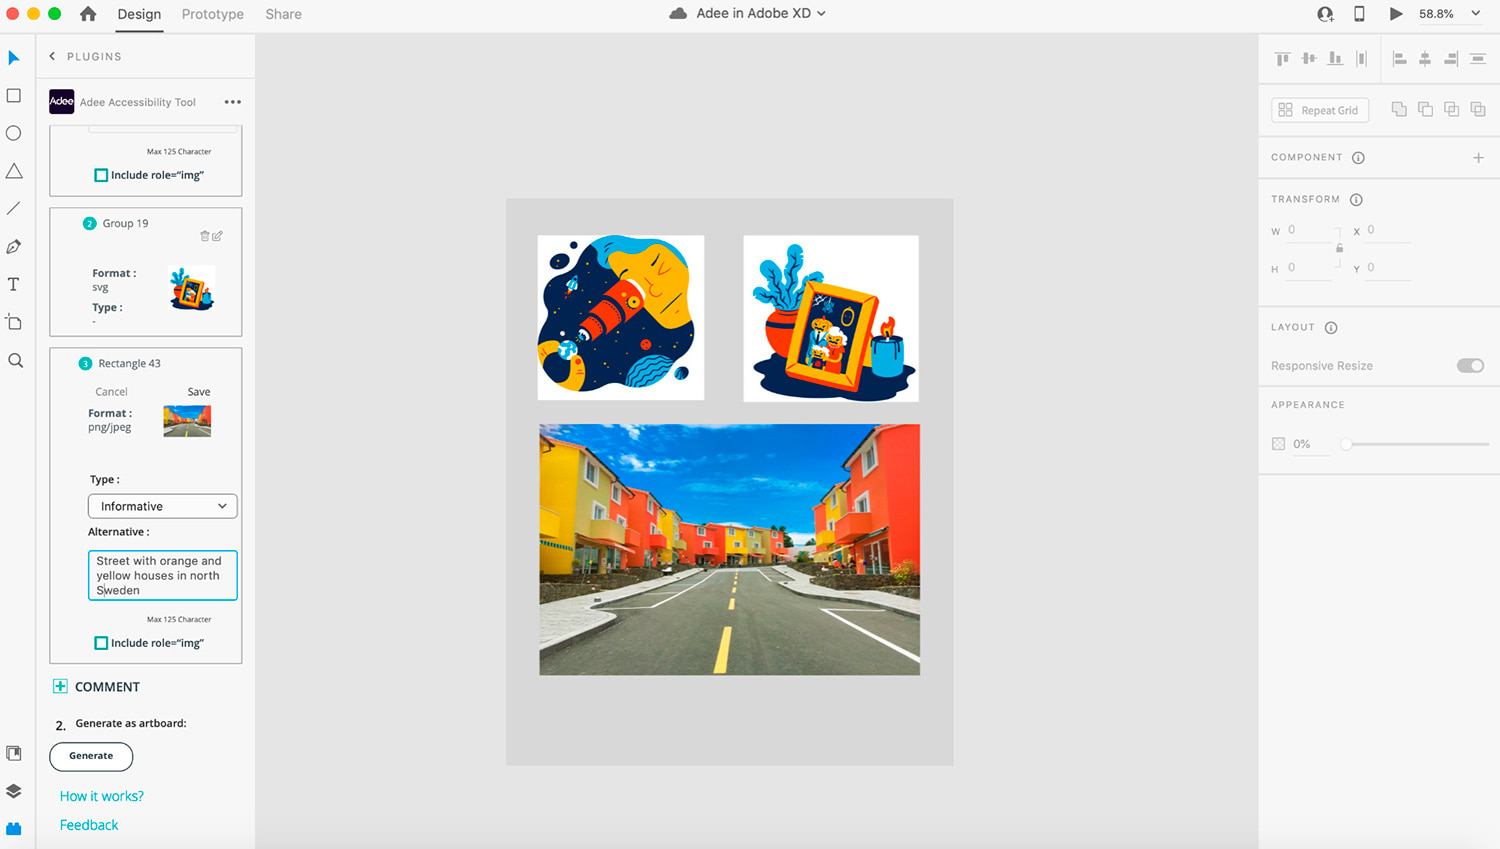
Based on the chosen image type and image format, Adee displays different fields and information to add to the image. For example, if an image format is SVG, instead of alt text you need to use description for longer human-readable description of the image/element and title for a short human-readable name for the image/element. In addition, Adee let designers communicate other considerations such as image role for use of screen readers, aria-describedby property and null alt text for decorative images.
4- Save and generate:
After filling in the fields and saving the information for each individual image, you can select the “generate” button in order to generate the information as a text document and share it with the relevant member of the team (developers, authors,...).
Tips for writing good alt text:
- Don’t use words like “image of” or “graphic of”, screen readers already announce this. For example, instead of saying “image of Damavand mountain” just say “Damavand mountain”.
- Consider maximum 125 characters for Alt text, maximum 64 characters for SVG image title, and maximum 125 characters for SVG image description.
- Use correct grammar to help screen readers, such as capitalizing the first letter.
- When describing a picture, you might sensibly and wisely use a top keyword or two: great. This will assist with your Search Engine Optimization. But only when done truthfully and sparingly [2].
Adee Touch Target Size Checker:
Designing touch targets (buttons, links, …) with a proper size and based on standards is difficult. This is mainly due to the fact that the way designers communicate their work in design tools (Pixel) does not directly represent device resolution. For instance, Apple devices, Android devices and even experts in the field, such as Nielsen, all have their own recommended touch target size, while at the same time there are so many screen sizes and resolutions.
Adee touch target size checker, does all these calculations and hides these details and complexity to simply let designers and developers concentrate on passing or failing in testing. Adee also gives suggestions on how to correct the errors and seamlessly apply them. Let’s see how to it in some simple steps:
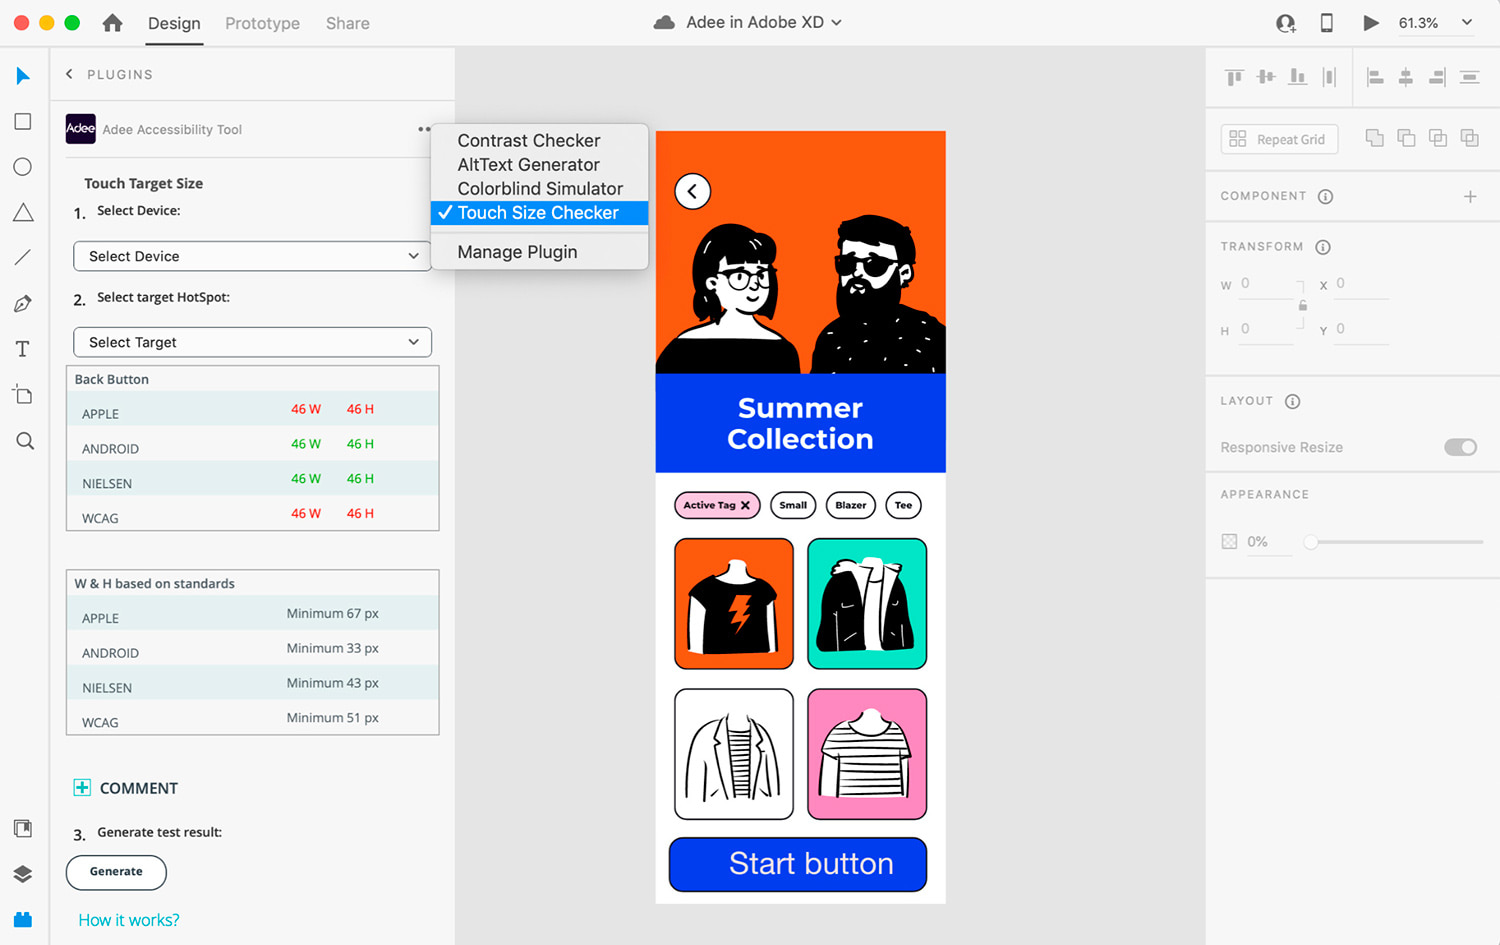
1- Running the tool:
From the plugin menu select the touch size checker tool. Note the above image is for Adobe XD, however the plugin works the same for Sketch and Figma.
2- Device selection:
The list in this dropdown menu is divided into two categories: Android devices and Apple devices. Which is based on the type of artboards/ frames designers can create in design platforms such Figma or Adobe XD. If you want a precise test result you can test with various types of devices, but if you just need a rough estimate, when you select any of the devices, Adee provides this information in a table on top which I explain more in step 4.
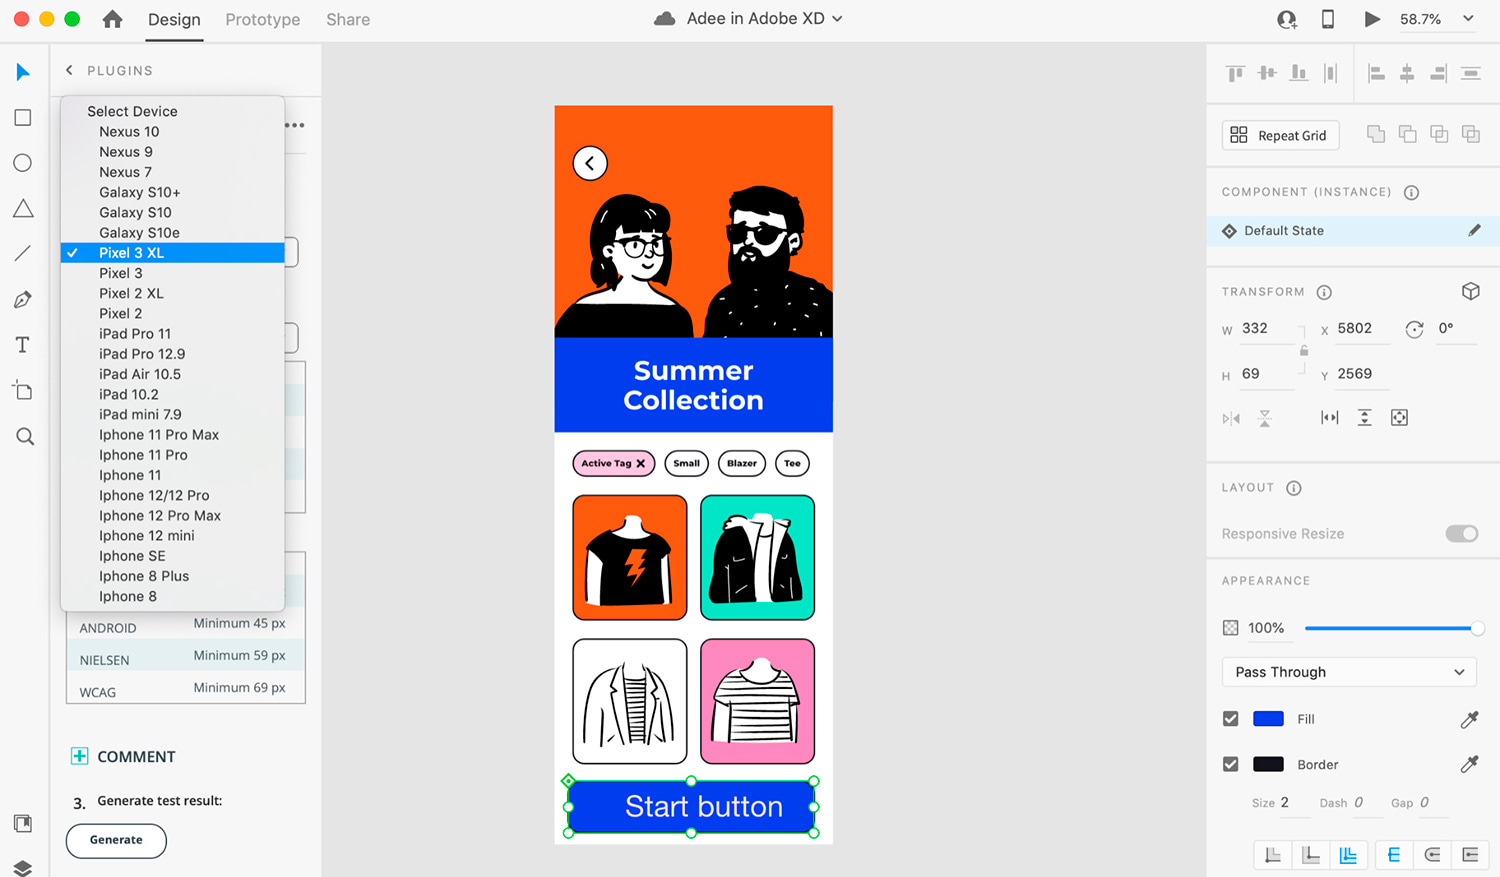
3- Target selection:
This part is easy! You just need to select the target such as text link, button, shape or icon in your design. Just keep in mind that before opening the plugin you need to select the targets you want to show in the dropdown list.
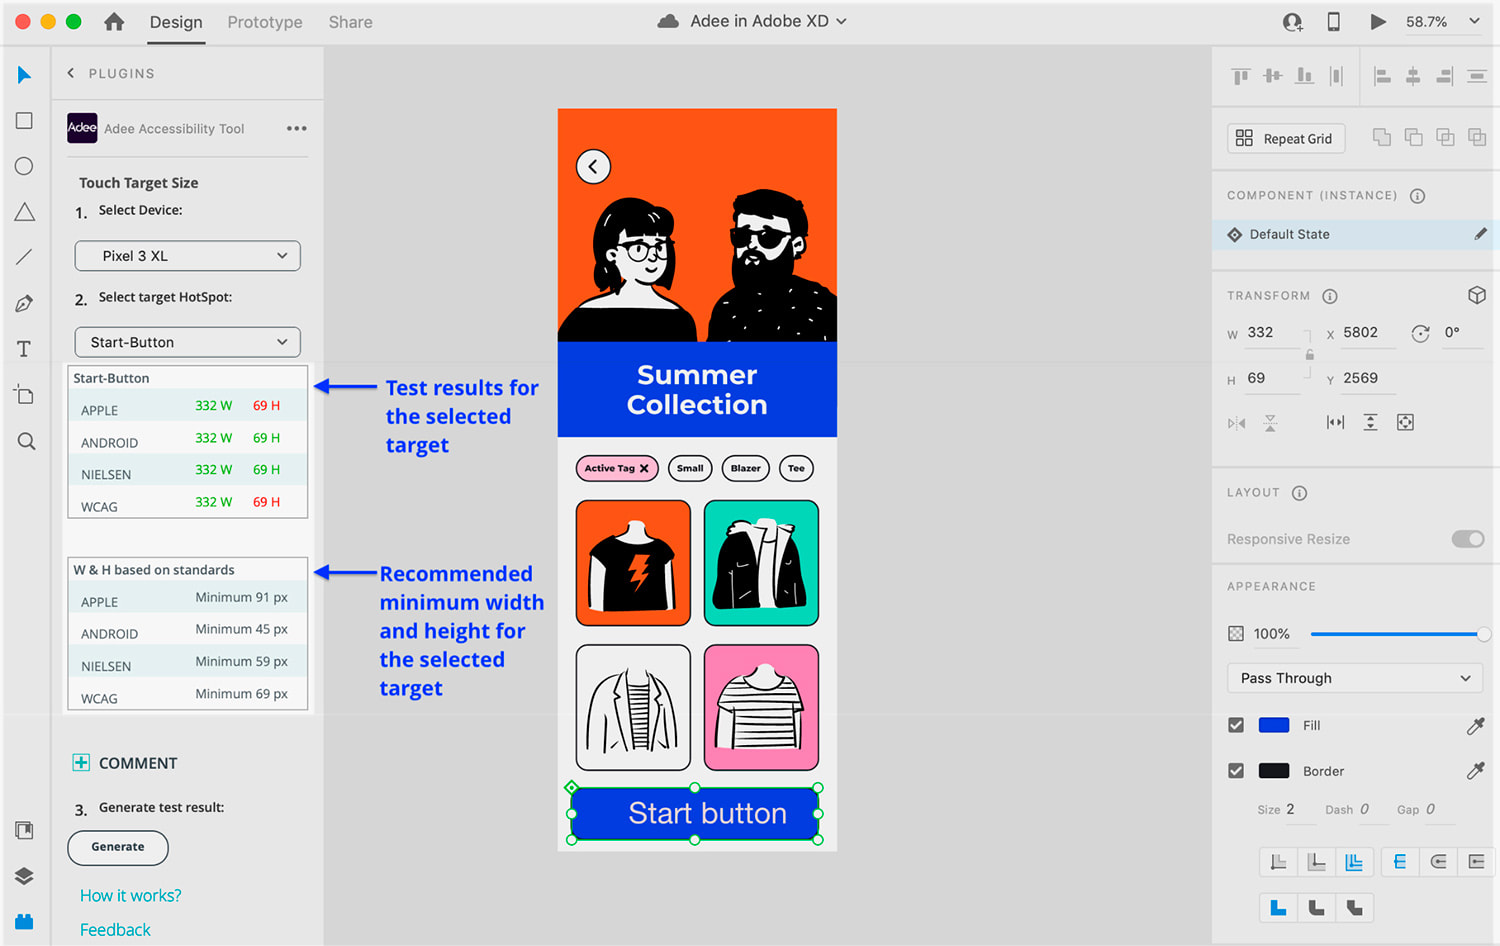
4- Test results:
There are two tables showing. The table on the top shows if the chosen target could pass or fail the test based on different standards.
The second table, recommends minimum width and height for the selected target in order to meet the standards. Adee does all the calculations behind the scenes and demonstrates the results in Pixel again to make it easy for designers to modify their work accordingly.
Wrapping up:
By taking some simple steps, using accessibility tools and getting feedback from end users, we can make digital products accessible and usable for all including those 15% of the world’s population with some form of disability [3]. These are all simple methods to get an idea of what someone experiences when using assistive technology.
About the Author
Samine is Phd student at School of Computer Science at the University of Sydney. Samine Created Adee in 2021 for Figma and Adobe XD. In this short period of time, Adee won Good design Award, ASSETS Conference Best Artefact award, and Adobe Design Fund.