


3D development is one of the hottest topics nowadays. Modern browsers have the capabilities that we would have never imagined 5 or 10 years ago. By taking advantage of fantastic JavaScript API WebGL, they can fully render complex 2D and 3D graphics without relying on third-party browser plug-ins.
As most of the major browsers now support WebGL, you can access 3D websites everywhere and also play an entire 3D game in your browser. The main downside of WebGL is its high level of inner complexity. Fear not, as I’m going to explore Babylon.js: an outstanding JavaScript framework for building 3D in the browser. Through this tutorial, you’ll learn:
At the end of this tutorial, I’ll show you the live demo of my Babylon.js project that will help you better understand the features and working of Babylon.js. Hopefully, this tutorial would prove to be a great guide for you, especially if you’re a newbie to the 3D web development. Let’s start!
What is Babylon.js?
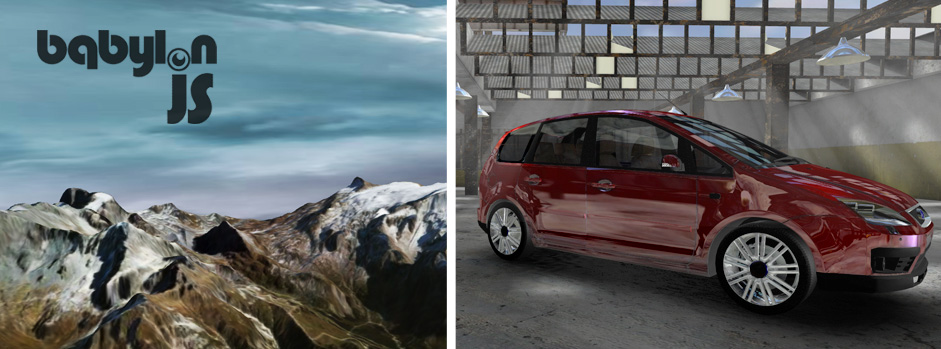
Babylon.js, brought to you by the folks at Microsoft, is an open source JavaScript framework through which you can build and render 3D games within a browser, with the help of WebGL and HTML5. While drawing a simple 3D object in raw WebGL requires you to deal with a huge amount of JavaScript code, Babylon.js lets you do the same thing with a minimal amount of code and very low level of complexity.
Babylon.js can be stated as "yet another Three.js" due to its powerful features, which give you the power to create almost everything, ranging from fully interactive 3D games to animated logos, in your browser. Though this JavaScript framework is currently on its early stage, but even it offers developers a solid foundation for crafting feature-rich WebGL creations that can be used almost everywhere. Hopefully, a lot of new cool features will be added soon.
Main Features of Babylon.js
The current version of Babylon.js has support for following amazing features:
-
General Features
- Complete scene graph with cameras, lights, materials, meshes, sprites and 2D layers.
- Animations engine.
- Collisions engine.
- Antialiasing.
- Scene picking.
- Physics engine (using cannon.js).
- Particles systems.

-
Highly Configurable Material That Supports:
- Opacity, Bump, Emissive, and Mirror textures
- Ambient, Specular, and diffuse lightning and textures
- Up to 4 lights (spots, directionals, hemispherics, and points)
- Reflection texture (projection, cubic, planar, and spheric)
- Skybox
- Vertex color
- Custom materials
- 4 bones per vertex
-
Optimizations Engines:
- Selection octrees
- Hardware accelerated instances
- Sub-meshes clipping
- Incremental loading
- Hardware scaling
- Frustum clipping
- Offline mode
-
Textures:
- Dynamic textures (canvas)
- Compressed (DDS) textures
- Video textures
- Render target textures
-
Special FX:
- Fullscreen mode
- Rendering layers
- Billboarding
- Shadow and Variance Shadow Maps
- Alpha testing
- Multi-views
- Fog
- Alpha blending
- Lens flares
- Post-processes (fxaa, refraction, black'n'white, blur, customs)
-
Meshes:
- Bones
- Dynamic meshes
- Mesh cloning
- Height maps
- Constructive solid geometries

Cameras (Orthographic and Perspective):
- Free
- Gamepad
- Arc rotate
- Virtual Joysticks
- Oculus Rift
- Touch
-
Import:
- Drag'n'drop support
- Exporter for Cheetah3d and Blender
- You can convert a Babylon scene file from .MXB, .FBX, and .OBJ.
Getting Started With Babylon.js
Before We Start:
In order to unleash the power of Babylon.js, the only thing you need to do is referencing its latest version in the head section of your HTML file.
Head over to the Babylon.js website and download the latest version of Babylon.js that is a small JavaScript file less than 200KB in size. Once you grabbed this file, import it in your HTML document.
Note: If you want to add touch events to your Babylon app, then you have to include Hand.js in your HTML page.
<html>
   <head>
      <title>My first Babylon.js app</title>
      <script src= "babylon.js"></script>
      <script src="hand.js"></script>
   </head>
   <body>
      <script>
         // Our JavaScript will go here.
      </script>
   </body>
</html>
That's all. I’ll put all the JavaScript code, which I’m going to create, into the empty <script> tag.
Apply Styles:
Now, add some styles in the head of your HTML page in order to make Babylon.js render the scene in full screen mode.
<html>
   <head>
      <title>My first Babylon.js app</title>
      <script src= "babylon.js"></script>
      <script src=" hand.js"></script>
      <style>
         html, body, div, canvas {
         width: 100%;
         height: 100%;
         padding: 0;
         margin: 0;
         }
      </style>
   </head>
   <body>
      <canvas id="canvas"></canvas>
      <script>
         // Our JavaScript will go here.
      </script>
   </body>
Creating the Engine:
The first thing you have to do, to display anything with Babylon.js, is to create the Engine that is the main object around which Babylon.js is built. The Engine works as the hub between WebGL and Babylon.js, and is responsible for instructing WebGL to create 3D objects.
<script>
var canvas = document.getElementById("canvas");
var engine = new BABYLON.Engine(canvas, true);
<script/>
Note: If you want to test if the current browser supports WebGL, use the code given below:
<script>
if (BABYLON.Engine.isSupported()) {
var canvas = document.getElementById("canvas");
var engine = new BABYLON.Engine(canvas, true);
}
<script/>
Creating the Scene:
Once you’ve created the class Engine, you’ll be able to create a scene where you can add all entities that work together for building a 3D object:
- Cameras (the point of view).
- Lights (the light source).
- Meshes (3D objects)
- Materials (which defines how a 3D object will be rendered).
Starting with the scene:
var scene = new BABYLON.Scene(engine);
Once you’ve set up the scene, create a camera.
var camera = new BABYLON.ArcRotateCamera("Camera", 0, Math.PI / 2, 13, BABYLON.Vector3.Zero(), scene);
camera.attachControl(canvas, false);
Let me explain what’s going on here. As I’ve mentioned earlier, Babylon.js has several cameras, but to keep the code simple, here I’m using the ArcRotateCamera that rotates around a given pivot and can be controlled with touch or mouse events.
In the above code, there are four parameters: the first is the name of the camera. The second one is the alpha (rotation angle around Y axis) and the third one is beta (rotation angle around X axis). The fourth one is the radius of the ArcRotateCamera, the next one (BABYLON.Vector3.Zero) is the target (which defines a 3D position) of the camera. The last one is the scene which contains the camera.
The function attachControl is used to automatically handle inputs (mouse, keyboard, and touch).
After creating the camera, now it’s the time to add a light.
var light = new BABYLON.HemisphericLight("light", new BABYLON.Vector3(0, 1, 0), scene);
As I’ve mentioned in the features, Babylon.js supports four kinds of lights, which are spot, directional, hemispheric, and point. You can create as many as lights in your script, but keep in mind, the StandardMaterial is unable to handle more than 4 simultaneous lights. Therefore, it handles the first 4 enabled lights in your script.
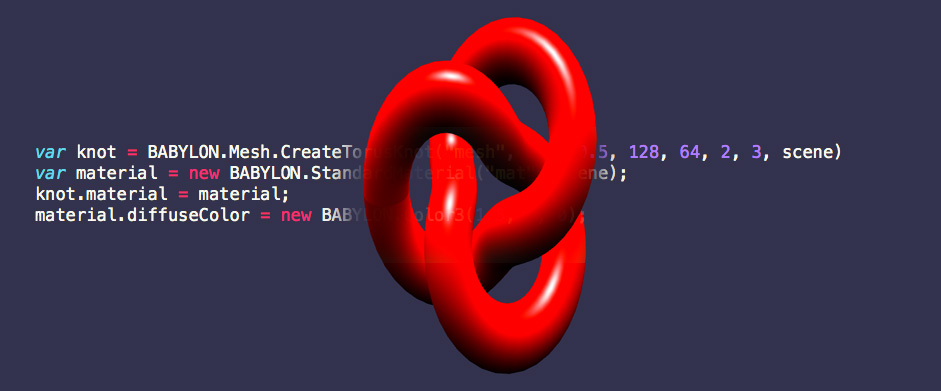
Creating the 3D Object:
After setting up scene, camera and light, now I’m going to create the mesh that is a 3D object. To create a 3D object, here I’m using CreateTorusKnot object.
var knot = BABYLON.Mesh.CreateTorusKnot("mesh", 2, 0.5, 128, 64, 2, 50, scene);
The above method takes eight parameters: name, radius, tube, radialSegments, tubularSegments, p, q, and scene. The torus-knot winds q times around a circle in the torus’ interior, and p times around its rotationally symmetric axis.
Next up, we need to create a new material object in order to define how the 3D object should be rendered and how it should look like.
var material = new BABYLON.StandardMaterial("mat", scene);
And apply this material to the knot.
knot.material = material;
Once you’ve applied the material, add some colors to your 3D object to make it more attractive. The StandardMaterial object supports many color combinations but for simplicity’s sake, here I’m using diffuse color that is the native color of an object.
material.diffuseColor = new BABYLON.Color3(1.5, 0, 0);
You can specify the color of the object material using the diffuseColor property.
Register a Render Loop:
Now, if you test the HTML file in your browser, you’ll see nothing. That’s because you haven’t rendered anything yet. After creating the scene, the next thing you have to do is registering a render loop to tell the scene to render all entities it owns.
var renderLoop = function () {
scene.render();
};
engine.runRenderLoop(renderLoop);
The renderLoop class is made of four parts:
- engine.beginFrame: Starts a new frame.
- scene.render: Asks the scene for rendering object.
- engine.endFrame: Present the current frame to the canvas after closing it.
- QueueNewFrame: Registers a new frame.
Animating the 3D Object:
Now, if you test the HTML file, you’ll see a 3D object of red color with no animation in your browser. Let’s rotate it to make it more exciting. Just add a function for scene.beforeRender and you’re good to go.
var alpha = 0;
knot.scaling.y = 1.5;
scene.beforeRender = function() {
knot.rotation.y = alpha;
alpha += 0.03;
};
The Result:
Congrats! You have successfully created your first 3D object. Below is the full code:
<html>
   <head>
      <title>My first Babylon.js app</title>
      <script src= "babylon.js"></script>
      <script src=" hand.js"></script>
      <style>
         html, body, div, canvas {
         width: 100%;
         height: 100%;
         padding: 0;
         margin: 0;
         }
      </style>
   </head>
   <body>
      <canvas id="canvas"></canvas>
      <script>
         if (BABYLON.Engine.isSupported()) {

                    var canvas = document.getElementById("canvas");
                    var engine = new BABYLON.Engine(canvas, true);

                    var scene = new BABYLON.Scene(engine);
                    var camera = new BABYLON.ArcRotateCamera("Camera", 0, Math.PI / 2, 13, BABYLON.Vector3.Zero (), scene);
                    camera.attachControl(canvas, false);

                    var light = new BABYLON.HemisphericLight("light", new BABYLON.Vector3(0, 1, 0), scene);

                    var knot = BABYLON.Mesh.CreateTorusKnot("mesh", 2, 0.5, 128, 64, 2, 50, scene);

                    var material = new BABYLON.StandardMaterial("mat", scene);
                    knot.material = material;
                    material.diffuseColor = new BABYLON.Color3(1.5, 0, 0);

                    var renderLoop = function () {
                    scene.render();
                    };
                    engine.runRenderLoop(renderLoop);

                    var alpha = 0;
                    knot.scaling.y = 1.5;

                    scene.beforeRender = function() {
                    knot.rotation.y = alpha;

                    alpha += 0.03;

                    };
         }
      </script>
   </body>
</html>
If you want to play around with the code or watch the live demo, you can do so here.