


One of the best parts of JavaScript, can also be the worst. This is the undoubtedly simplistic ability to add an opening and closing script tag to the head of the HTML document and throw some spaghetti code in there. And voila! It works! Or does it? What is spaghetti code you ask? Spaghetti code is an unflattering term for code that is messy, has a tangled control structure, and is all over the place. It is nearly impossible to maintain and debug, usually has very poor structure, and is prone to errors.
So how do you quit writing this kind of code? In my humble opinion, you only have two options. Again, this is just my opinion. One, you use any of the umpteen number of JavaScript frameworks available at your disposal. Or two, you learn how to write JavaScript code with some sort of pattern or structure. MVC, MVP, and MVVM are a few of the common patterns to help guide developers toward creating abstracted and decoupled solutions. The main difference between these patterns boils down to how the Data Layer, Presentation Layer, and Application Logic are handled. In this blog post, you will be focusing on the MVC or Model-View-Controller Pattern.
Model (Data Layer)- This is where the data is stored for your app. The model is decoupled from the views and controllers and has deliberate ignorance from the wider context. Whenever a model changes, it will notify its observers that a change has occurred using an Event Dispatcher. You will read about the Event Dispatcher shortly. In your To Do List App you will be building, the Model will hold the list of tasks and be responsible for any actions taken upon each task object.
View (Presentation Layer)- This part of your App has access to the DOM and is responsible for setting up Event Handlers such as: click, onmouseover, onmouseout, etc. The view is also responsible for the presentation of the HTML. In your To Do List App, the view will be responsible for displaying the list of tasks to the user. However, whenever a user enters in a new task through the input field, the view will use an Event Dispatcher to notify the controller, then the controller will update the model. This allows for swift decoupling of the view from the model.
Controller (Application Logic)- The controller is the glue between the model and the view. The controller processes and responds to events set off by either the model or view. It updates the model whenever the user manipulates the view, and can also be used to update the view whenever the model changes. In this tutorial, you will be updating the view directly from your model by dispatching an event. But, either way is completely acceptable. In your To Do list App, when the user clicks the add task button, the click is forwarded to the controller, and the controller modifies the model by adding the task to it. Any other decision making or logic can also be performed here, such as: saving the data using HTML local storage, making an asynchronous save to the database/server, and more.
Event Dispatcher - The Event Dispatcher is an object that allows you to attach an unlimited number of functions/methods to it. When you finally call the notify method on that Event object, every method you attached to that Event will be ran. You will see this happening a lot in the source code below.
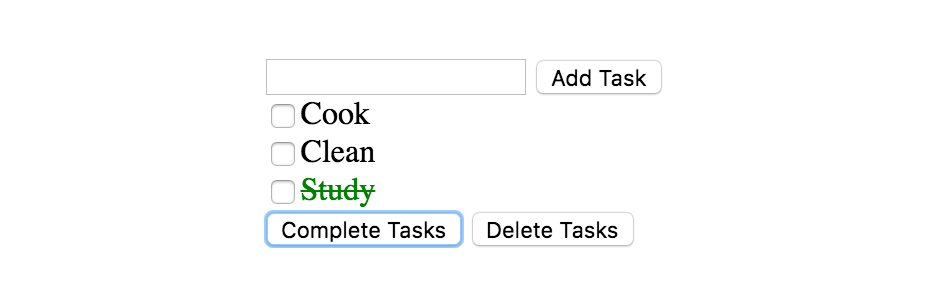
Now that you have a basic understanding of why you should use a JavaScript Design Pattern, and what the MVC architecture is all about, now you can start building the app. Here is a quick overview of how this tutorial will work. First, I will present the code to you. This will give you the opportunity to examine and walk through it. Second, I will go into detail about a few of the core concepts that the below code base is using, and try to shed some light upon any potential hazy or gray areas that might come across as confusing. In conclusion, I will show you a couple of screenshots of the final component. To get the most out of this tutorial, I suggest you go through this a couple of times until you feel comfortable creating this app on your own. This tutorial assumes prior HTML and JavaScript experience. If you are new to JavaScript, I recommend taking a quick look at http://www.w3schools.com/Js/. You can also find the project on GitHub at https://github.com/joshcrawmer4/Javascript-MVC-App. Go ahead and get started!
Start Writing Some Code
Create an index.html file with the below code in it:
<!doctype html>
<html>

<head>
    <title>Javascript MVC</title>
    <script src="https://code.jquery.com/jquery-2.2.3.min.js" integrity="sha256-a23g1Nt4dtEYOj7bR+vTu7+T8VP13humZFBJNIYoEJo=" crossorigin="anonymous"></script>

    <style>

    </style>

</head>


<body>

    <div class="js-container">

        <input type="text" class="js-task-textbox">
        <input type="button" class="js-add-task-button" value="Add Task">

        <div class="js-tasks-container"></div>
        <!-- end tasks -->
        <input type="button" class="js-complete-task-button" value="Complete Tasks">
        <input type="button" class="js-delete-task-button" value="Delete Tasks">

    </div>
    <!-- end js-container -->


    <script src="EventDispatcher.js"></script>
    <script src="TaskModel.js"></script>
    <script src="TaskView.js"></script>
    <script src="TaskController.js"></script>
    <script src="App.js"></script>

</body>

</html>
Next create an EventDispatcher.js file with the below code:
var Event = function (sender) {
    this._sender = sender;
    this._listeners = [];
}

Event.prototype = {

    attach: function (listener) {
        this._listeners.push(listener);
    },

    notify: function (args) {
        for (var i = 0; i < this._listeners.length; i += 1) {
            this._listeners[i](this._sender, args);
        }
    }

};
Next Create a TaskModel.js file with the below code:
var TaskModel = function () {
     this.tasks = [];
     this.selectedTasks = [];
     this.addTaskEvent = new Event(this);
     this.removeTaskEvent = new Event(this);
     this.setTasksAsCompletedEvent = new Event(this);
     this.deleteTasksEvent = new Event(this);

 };

 TaskModel.prototype = {

     addTask: function (task) {
         this.tasks.push({
             taskName: task,
             taskStatus: 'uncompleted'
         });
         this.addTaskEvent.notify();
     },

     getTasks: function () {
         return this.tasks;
     },

     setSelectedTask: function (taskIndex) {
         this.selectedTasks.push(taskIndex);
     },

     unselectTask: function (taskIndex) {
         this.selectedTasks.splice(taskIndex, 1);
     },

     setTasksAsCompleted: function () {
         var selectedTasks = this.selectedTasks;
         for (var index in selectedTasks) {
             this.tasks[selectedTasks[index]].taskStatus = 'completed';
         }

         this.setTasksAsCompletedEvent.notify();

         this.selectedTasks = [];

     },


     deleteTasks: function () {
         var selectedTasks = this.selectedTasks.sort();

         for (var i = selectedTasks.length - 1; i >= 0; i--) {
             this.tasks.splice(this.selectedTasks[i], 1);
         }

         // clear the selected tasks
         this.selectedTasks = [];

         this.deleteTasksEvent.notify();

     }


 };
Next Create a TaskView.js file with the below code:
var TaskView = function (model) {
    this.model = model;
    this.addTaskEvent = new Event(this);
    this.selectTaskEvent = new Event(this);
    this.unselectTaskEvent = new Event(this);
    this.completeTaskEvent = new Event(this);
    this.deleteTaskEvent = new Event(this);

    this.init();
};

TaskView.prototype = {

    init: function () {
        this.createChildren()
            .setupHandlers()
            .enable();
    },

    createChildren: function () {
        // cache the document object
        this.$container = $('.js-container');
        this.$addTaskButton = this.$container.find('.js-add-task-button');
        this.$taskTextBox = this.$container.find('.js-task-textbox');
        this.$tasksContainer = this.$container.find('.js-tasks-container');

        return this;
    },

    setupHandlers: function () {

        this.addTaskButtonHandler = this.addTaskButton.bind(this);
        this.selectOrUnselectTaskHandler = this.selectOrUnselectTask.bind(this);
        this.completeTaskButtonHandler = this.completeTaskButton.bind(this);
        this.deleteTaskButtonHandler = this.deleteTaskButton.bind(this);

        /**
        Handlers from Event Dispatcher
        */
        this.addTaskHandler = this.addTask.bind(this);
        this.clearTaskTextBoxHandler = this.clearTaskTextBox.bind(this);
        this.setTasksAsCompletedHandler = this.setTasksAsCompleted.bind(this);
        this.deleteTasksHandler = this.deleteTasks.bind(this);

        return this;
    },

    enable: function () {

        this.$addTaskButton.click(this.addTaskButtonHandler);
        this.$container.on('click', '.js-task', this.selectOrUnselectTaskHandler);
        this.$container.on('click', '.js-complete-task-button', this.completeTaskButtonHandler);
        this.$container.on('click', '.js-delete-task-button', this.deleteTaskButtonHandler);

        /**
         * Event Dispatcher
         */
        this.model.addTaskEvent.attach(this.addTaskHandler);
        this.model.addTaskEvent.attach(this.clearTaskTextBoxHandler);
        this.model.setTasksAsCompletedEvent.attach(this.setTasksAsCompletedHandler);
        this.model.deleteTasksEvent.attach(this.deleteTasksHandler);

        return this;
    },

    addTaskButton: function () {
        this.addTaskEvent.notify({
            task: this.$taskTextBox.val()
        });
    },

    completeTaskButton: function () {
        this.completeTaskEvent.notify();
    },

    deleteTaskButton: function () {
        this.deleteTaskEvent.notify();
    },

    selectOrUnselectTask: function () {

        var taskIndex = $(event.target).attr("data-index");

        if ($(event.target).attr('data-task-selected') == 'false') {
            $(event.target).attr('data-task-selected', true);
            this.selectTaskEvent.notify({
                taskIndex: taskIndex
            });
        } else {
            $(event.target).attr('data-task-selected', false);
            this.unselectTaskEvent.notify({
                taskIndex: taskIndex
            });
        }

    },

    show: function () {
        this.buildList();
    },

    buildList: function () {
        var tasks = this.model.getTasks();
        var html = "";
        var $tasksContainer = this.$tasksContainer;

        $tasksContainer.html('');

        var index = 0;
        for (var task in tasks) {

            if (tasks[task].taskStatus == 'completed') {
                html += "<div style="color:green;">";
            } else {
                html += "<div>";
            }

            $tasksContainer.append(html + "<label><input type="checkbox" class="js-task" data-index="" + index + "" data-task-selected="false">" + tasks[task].taskName + "</label></div>");

            index++;
        }

    },


    /* -------------------- Handlers From Event Dispatcher ----------------- */

    clearTaskTextBox: function () {
        this.$taskTextBox.val('');
    },

    addTask: function () {
        this.show();
    },

    setTasksAsCompleted: function () {
        this.show();

    },

    deleteTasks: function () {
        this.show();

    }

    /* -------------------- End Handlers From Event Dispatcher ----------------- */


};
Next Create a TaskController.js file with the below code:
var TaskController = function (model, view) {
    this.model = model;
    this.view = view;

    this.init();
};

TaskController.prototype = {

    init: function () {
        this.createChildren()
            .setupHandlers()
            .enable();
    },

    createChildren: function () {
        // no need to create children inside the controller
        // this is a job for the view
        // you could all as well leave this function out
        return this;
    },

    setupHandlers: function () {

        this.addTaskHandler = this.addTask.bind(this);
        this.selectTaskHandler = this.selectTask.bind(this);
        this.unselectTaskHandler = this.unselectTask.bind(this);
        this.completeTaskHandler = this.completeTask.bind(this);
        this.deleteTaskHandler = this.deleteTask.bind(this);
        return this;
    },

    enable: function () {

        this.view.addTaskEvent.attach(this.addTaskHandler);
        this.view.completeTaskEvent.attach(this.completeTaskHandler);
        this.view.deleteTaskEvent.attach(this.deleteTaskHandler);
        this.view.selectTaskEvent.attach(this.selectTaskHandler);
        this.view.unselectTaskEvent.attach(this.unselectTaskHandler);

        return this;
    },


    addTask: function (sender, args) {
        this.model.addTask(args.task);
    },

    selectTask: function (sender, args) {
        this.model.setSelectedTask(args.taskIndex);
    },

    unselectTask: function (sender, args) {
        this.model.unselectTask(args.taskIndex);
    },

    completeTask: function () {
        this.model.setTasksAsCompleted();
    },

    deleteTask: function () {
        this.model.deleteTasks();
    }

};
Next Create a App.js file with the below code:
$(function () {
     var model = new TaskModel(),
         view = new TaskView(model),
         controller = new TaskController(model, view);
 });
Overview
Okay, so what is going on in each file!
Index.html - Not much new here. Including the jQuery CDN, setting up some basic HTML, and loading the JavaScript files that we will be using in this project. Wow! That was easy!
EventDispatcher.js - This is a class with two methods, attach() and notify(). The attach() method accepts a function as a parameter. You can call attach() as many times as you want, and the function you pass can contain whatever code inside you want. Once you call the notify method on that Event object, each function you attached to that Event will be ran.
TaskModel.js - This class has some basic methods for adding and deleting actual task objects from the tasks array. Setting up three Event objects inside the constructor function, allows the model to call the notify() method on each event object after a task has been added, marked as complete, or deleted. This, in turn, passes on the responsibility to the view to re-render the HTML to show the updated list of tasks. The main thing to recognize is that the Model passes off responsibility to the View. Model -> View.
TaskView.js - This is the largest file in this project and could have been abstracted into multiple views. But for simplicity’s sake, I put everything into one class. The constructor function sets up five Event objects. This allows the view to call the notify() method on each Event object, thus passing the responsibility onto the controller. Next, you see that the constructor calls the init() method. This init method uses method chaining to set up the backbone of this class.
createChildren() - Caches the $('.js-container') DOM element in a this.$container variable, then refers to that variable for each element thereafter it needs to find(). This is merely a performance thing, and allows jQuery to pull any elements from the variable instead of requerying/crawling the DOM. Notice the use of return this. This allows for the method chaining inside the previous init() call.
setupHandlers() - This part can be a little tricky to wrap your head around for the first time. This method is setting up the event handlers and changing the scope of the this keyword inside that handler. Basically, whenever you run into a JavaScript event handler and plan to use the ever so famous this keyword inside that callback function, then this is going to reference the actual object or element the event took place on. This is not desirable in many cases, as in the MVC case when you want this to reference the actual class itself. Here, you are calling the bind(this) method on a JavaScript callback function. This changes the this keyword scope to point to that of the class instead of the object or element that initialized that event. Mozilla Foundation has a good tutorial explaining how to use scope bound functions.
enable() - This method sets up any DOM events and attaches any functions to the Event Dispatcher that were created by the Model. Look at this line of code:
this.model.addTaskEvent.attach(this.addTaskHandler);
What is actually happening here? When the model calls addTaskEvent.notify() your view will run the this.addTaskHandler() method. Sweet! You're actually seeing how the EventDispatcher works! This allows your classes to talk to each other while also staying decoupled. The addTaskHandler() method then calls the show() method which in turn calls the buildList() method and re-renders the HTML list.
So what should you take from all of this? Basically, once the model passes responsibility to the view, the view then re-renders the HTML to show the most up-to-date task objects. Also, whenever a user manipulates the view through a DOM event the view then passes off responsibility to the controller. The view does not work directly with the model.
TaskController.js - This class sits between the view and the model and acts as the glue that binds them together. It allows for easy decoupling of your model and view. Whenever the view uses the EventDispatcher, the controller will be there to listen and then update the model. Besides that, all the method declarations inside this file should look relatively similar to the View and Model.
App.js - This file is responsible for kicking off the app. An instance of the Model-View-Controller gets created here.
Conclusion
As a developer you must always be striving to stay current. Whether this is getting involved with projects on GitHub, dabbling in a new language, or learning design patterns and principles. But one thing is for certain, you must always be moving forward. Now that you have a basic overview of how to write JavaScript the MVC way, you see how it is possible to quit writing spaghetti code and how you can start writing cleaner and more maintainable code. Feel free to reach out to me on GitHub or post any questions in the comments section below.