
Discover the process behind Merci-Michel’s creative experience for Lacoste “Draw It Yourself”.
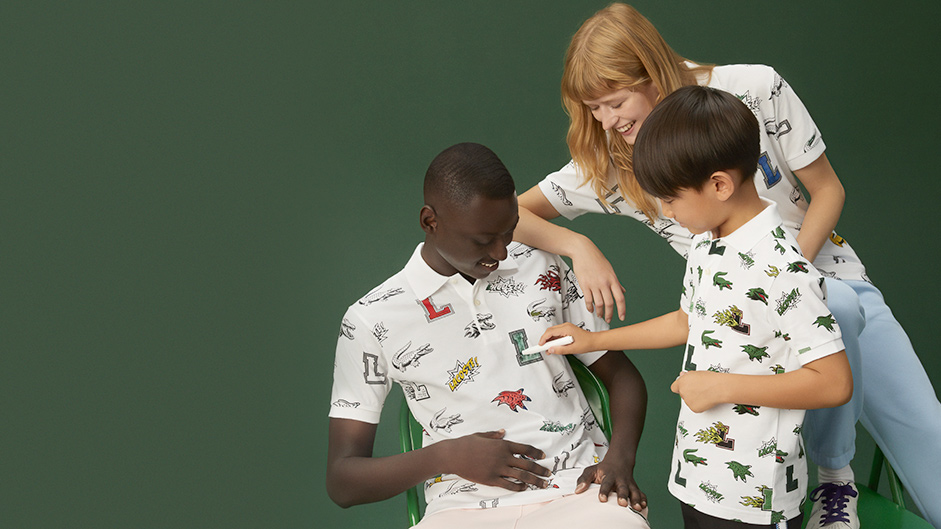
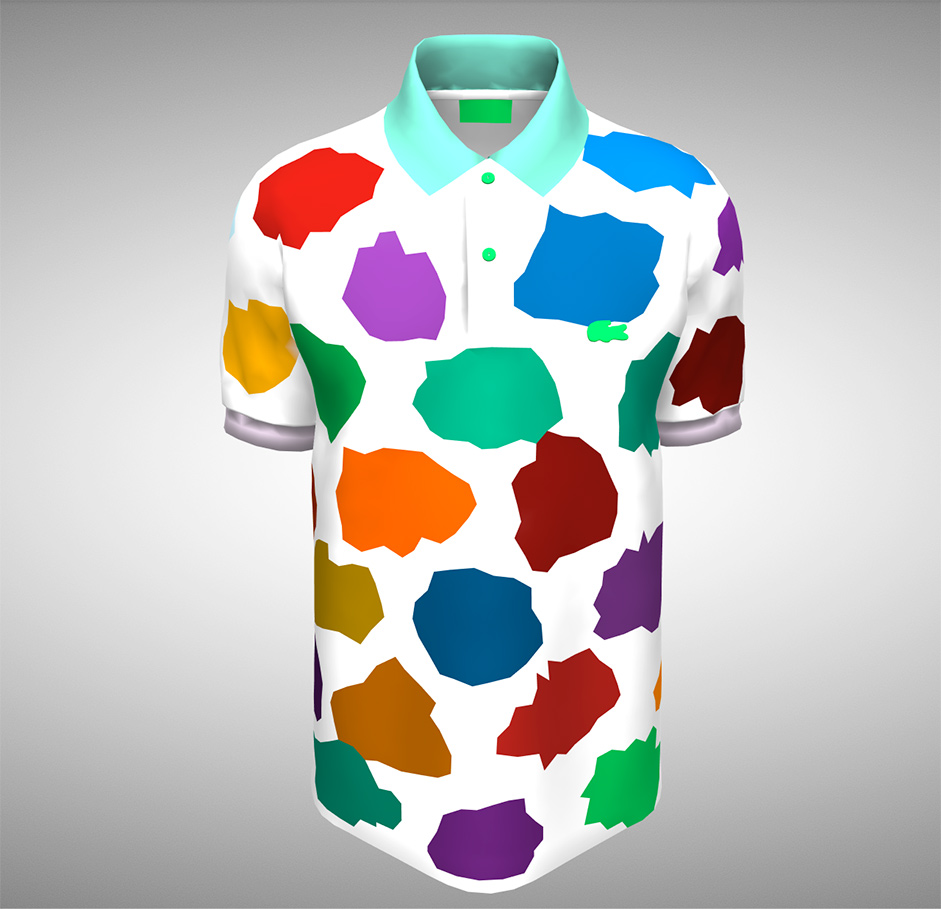
Lacoste contacted us for the launch of their new Limited Edition polo “Draw It Yourself”, as part of their year-end campaign. In real life, the polo is sold with 4 erasable markers to personalize the patches directly on it. So we decided to reproduce this principle in a unique digital version.
Our main objective was to create a tool that was easy to use, really user-friendly, that allowed novices as well as the greatest artists to participate.
Mechanics & logics of the experience
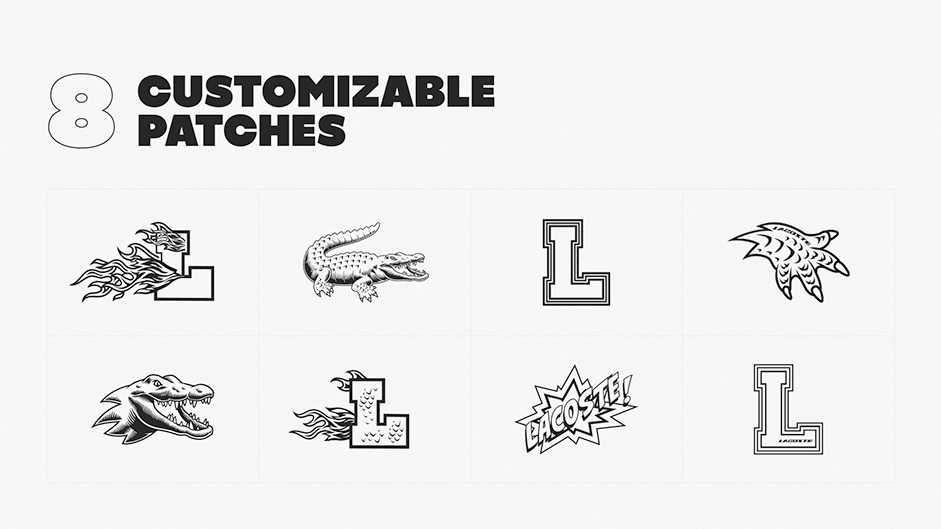
The users have access to 3 drawing tools (a marker, a paint bucket and an eraser) and 5 colors, to be able to freely customize the 8 patches. They can also customize the collar, body and sleeves of the polo shirt with the colors of their choice.
Once finished, they access a tool to customize their “shared image” and choose the angle they prefer to present it to the world. Each week, a Grand Jury selects the most creative polo of the week from all the entries. The winner is featured in the Gallery, along with other designs.

From real life to digital clothes
The website is made of two main parts:
- the first one is the polo shirt view, where you can see the 8 patches repeated along the fabric;
- the second one is the flat view where you can draw.
In WebGL, we are limited by the specs of each device, so we must align on the weakest one
Knowing that, we can only load 8 textures inside a single shader, the problem is that we’ve got 8 patches filling up all texture slots already… In those cases, the solution we use is to group them in a single atlas texture (atlas are kind of arrays of textures you can pick into if you have the coordinates).
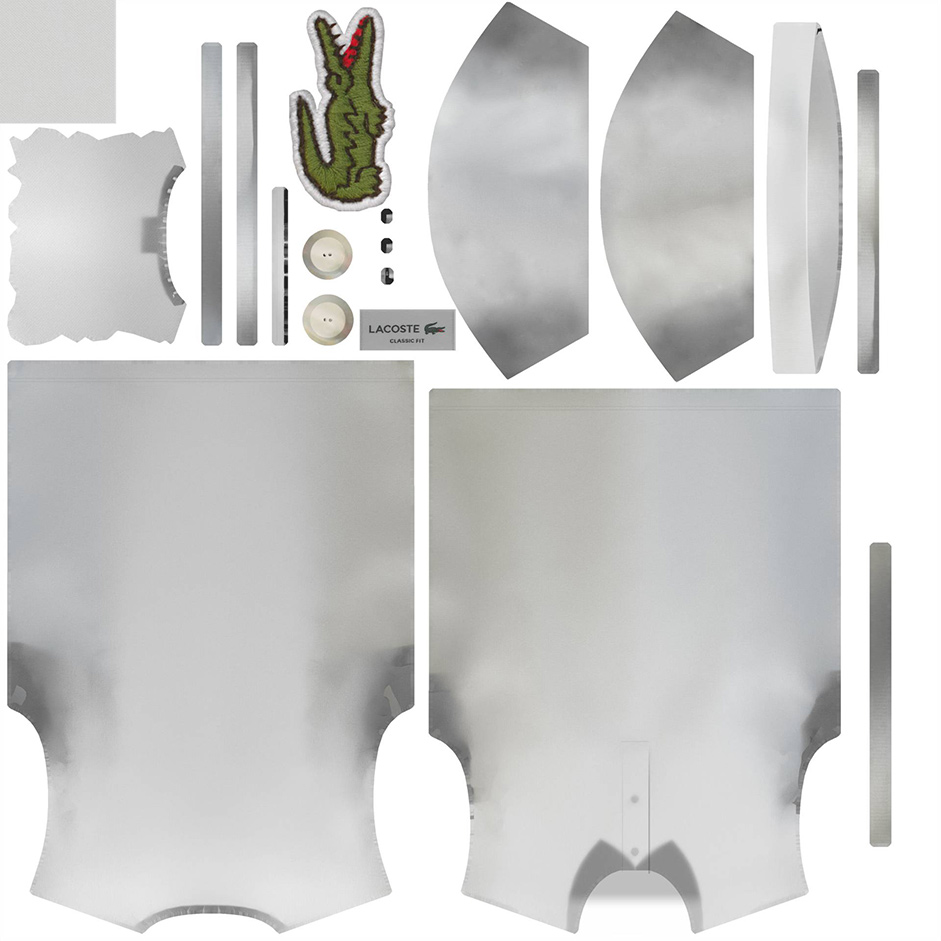
The lighting is generated from an HDR environment map (what you see is a JPG, so some data got “lost in translation” 🥁 so you can see it).
Shadows and ambient occlusions are baked into the diffuse map, then the shader blends it all!
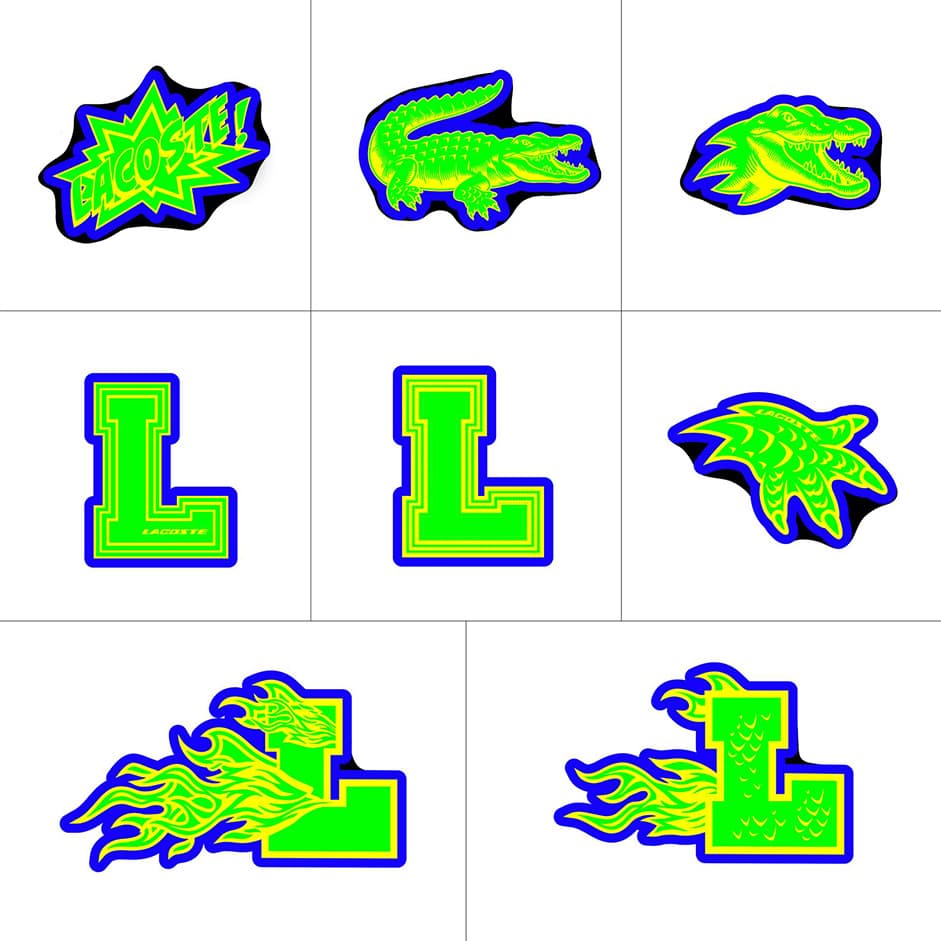
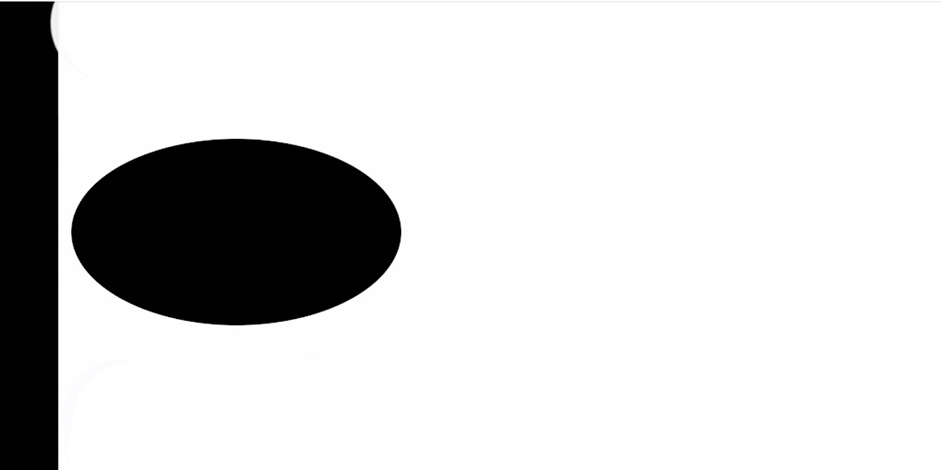
As you can see here in details, every patch uses the red, green, blue & alpha channels for distinct purposes :
- the red channel (here in yellow) is the black base of the patch
- the green is the drawable area
- the blue is the white outline when you hover it
Finally, the alpha allows us to know the boundaries of the patch in order to detect when to trigger the hover effect.
It's not finished yet: there are about 40 printed patches to place around the polo shirt, and we managed to render it all in one draw-call.
The basic method would have been to split the whole mesh into parts containing only 1 patch in order to detect which one we are currently moving the cursor on. But we also wanted an animation that would have made that method almost impossible, so we found another way of detecting which one is currently selected.
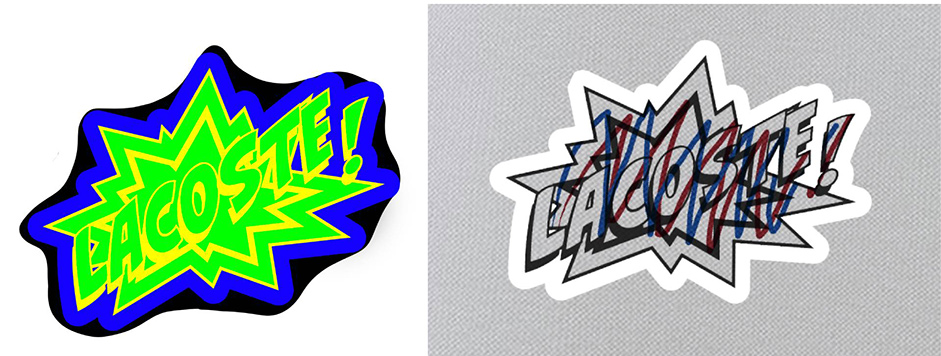
The model is painted inside the vertices, we usually call that “vertex color” or “vertex painting”. Each patch has got its unique color even if they look similar; they are all unique.
Now, to detect the current patch, we use some ray-casting on the model and we read the UVs and the vertex-color of that part. UVs are used to know which patch we are on, if the user click on it we know which one to open. The vertex color is shared to the material through a uniform, so the fragment shader knows specifically which patch need an outline. If the current texel color matches the vertex color uniform, everything that is blue from the atlas would be tinted white.
Finally, once everything blends perfectly, we can animate things and, as you know at Merci-Michel, we make a special effort with animations 💚.
How did we add that fluid movement to the polo when you spin it? It’s quite simple: the shader rotates each vertex around the vertical center of the model.
First step: create a rotation animation based on the mesh rotation speed. You can see here that the whole model is rotating uniformly.
Lacoste polo's animation
To compute that elastic easing that react on user inputs we do some magic:
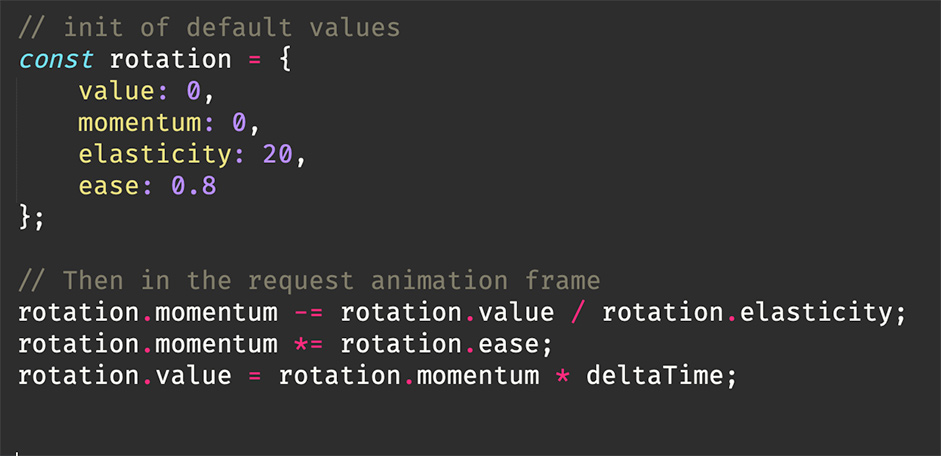
Then to avoid that rigid movement over the whole shirt, we multiply the rotation to the Y axis, in that example you can see that the blacker (the higher it is on the model) the less it moves. And next to it, the final animation.
Vertical multiplicator of the flex fabric animation left, results on the right
To close the animation topic, let’s talk about the visual feedback when selecting a patch. We wanted an animation representing the grabbing area of the polo that was clicked, without applying too much distortion… It feels like there’s a balloon that inflates behind the fabric and that pushes it towards your face.
To achieve this, when the user interacts with the polo, a ray-casting result gives us the coordinates on the surface of the mesh, which we send to the shader (you can see that the whiter it is, the closer it is to the pointer). Inside the shader, we then scale all vertices starting from that point.
Point where the scale will come from on the left results on the right
Drawing on the web
The drawing library is made from scratch, due to a ton of browsers limitations. Let’s start by what we need:
- a way to draw into a texture that we can transfer to a shader
- a texture we can save in cache in case you reload the page
- a texture you can totally or partially clear
Everyone who's a web developer should start to think about 2D canvas and to be honest that’s where we started from…
But you may ask yourself “what happened so you didn’t use a 2D canvas?” and we could answer, like Kevin Flynn about CLU from the TRON movie, that “Safari… Safari happened”; and it would be kinda matching the drama.
Safari is bad at refreshing a canvas texture within a shader, despite many trials to optimize those data. So what did we do? We made a whole drawing system using an ArrayBuffer where each entry represents the RGB values of the pixels. That buffer of 4096x4096xRGB (~67Mb of your local storage but we’d get back to that later) is fully manipulated “by hand” 👋 (by code of course).
When the user clicks to draw, we fill a circle of pixels all around to add some anti-aliasing and that circle has the same screen-size whatsoever as the current zoom.
We can see points are always the same size despite zooming in and out
Also, no browser triggers a pointer event on all pixel moves, there is latency depending on refresh rate, screen latency and CPU busyness. So, we apply the same drawing-call along the current pointer position and the previous one to generate a continuous line. You can check here the drawing method with and without using those interpolation points:
Points interpolation vs not
Now that we have described the drawing, let’s talk a bit about the filling option also known as “paint bucket”. The basis of a paint bucket is simple: select a pixel, store its current color (let’s say black), then parse its contiguous pixels (pixels that are direct neighbours: top, right, bottom, left), and if the pixel is the same color (black in our case), change its color. Repeat the same process on and on, until there are no matching pixels.
Now, from another array buffer that store the atlas data, we also check that the pixel isn't a part of the patch’s black (remember the green channel above? That’s him in action).
Example of the paint bucket in action
Storing a tremendous amount of data locally
All web browsers are not equal in terms of storage, but it is around 5Mb-ish max.
Our painting is a 4K image of 4096x4096 containing 3 channels per pixel (red, green & blue). Each channel entry of the array buffer is between 0 and 255, so we use the uint8 type because it matches perfectly.
Another problem is that THREE.JS no longer supports RGBFormat but only RGBAFormat. So we had to store a zero Ø between RGB to match RGBA needs. It may looks negligible but it pops the buffer from ****50,331,648 bits in length to 67,108,864 bits (yeah… that's a lot) which means ~67.1 megabits, or ~8.3 megabytes.
It is ~3.3Mb above the maximum data we can store in a browser using local storage… A newcomer called IndexedDB came to the rescue!
IndexedDBt has not been designed for that, but it works well so, why wouldn’t we use it for? It allows us to use 60% of the storage device from Chrome (we do think that’s a bit too much), 2Gb for the rest of the common browsers. By default.
So we simply store the whole buffer into an indexed database, no big deal? Of course yes, why should web development be easy!? It is slow… what a surprise! We managed to limit the number of write to only what changed, and we only save when you leave a patch, we use the transition between both views to do the rough stuff seamlessly.
Check out that magnificent FPS drop if we try to save that array buffer at each draw iteration compared to when we move the cursor without painting (we drop from +60fps to <30fps).
Here is the example of trying saving the draw on each call (when not drawing you can notice the fps jump)
Final Words

Thanks for reading, this was just the tip of the iceberg of this really nice collaboration with Lacoste, providing a creative and immersive experience for their customers. "Draw It Yourself" was also very well received by the general public who participated widely, giving us the best reward of all! Thanks again to the Lacoste team for their trust!
Try it here.
Company Info
Merci-Michel is a (french) Digital Gamification Studio.
Visit our website.
Follow us on Instagram and Twitter for more back stories!