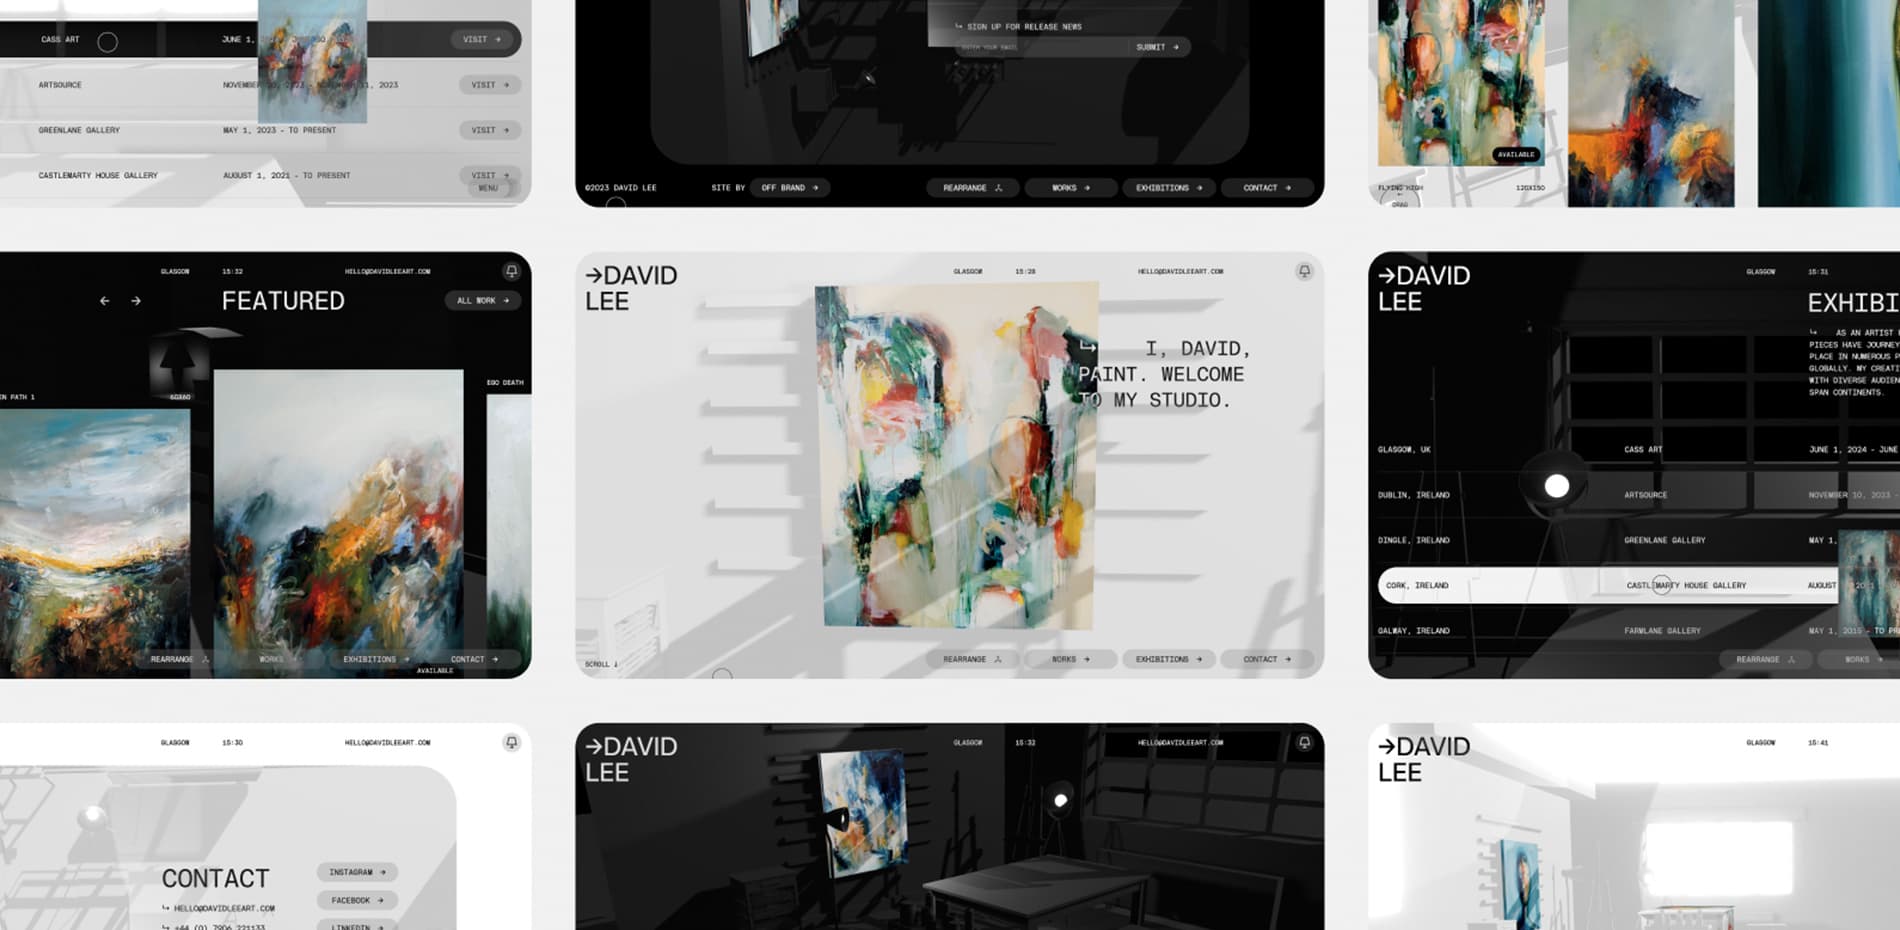
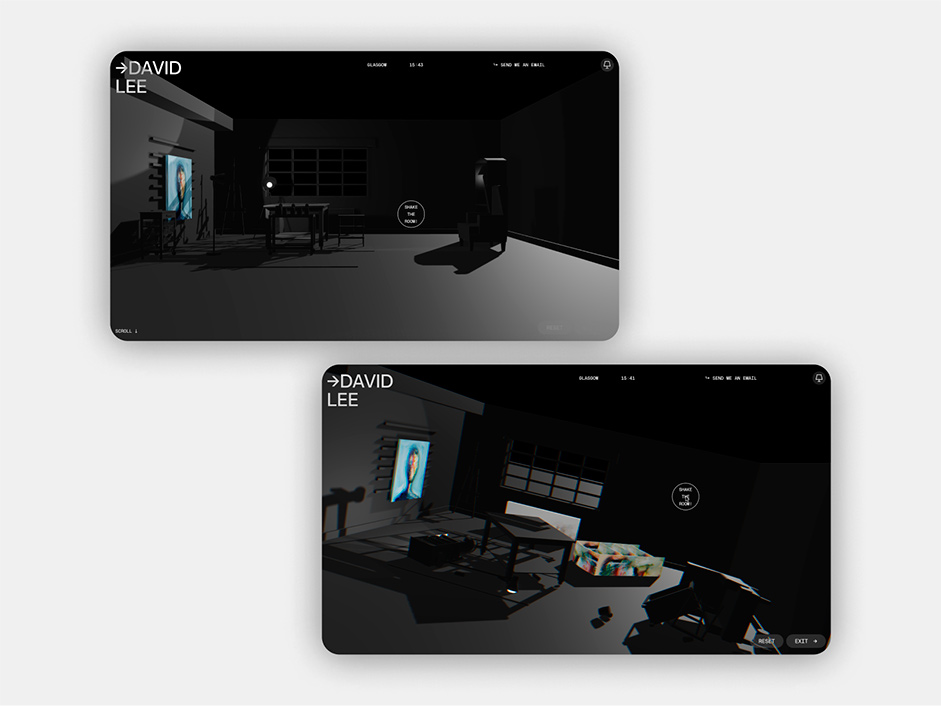
When David approached us for a new portfolio site, he told us that he wanted to stand out. He asked us to utilise 3D, but not to allow the website’s visuals to overpower his work: David’s art had to be at the centre of the experience. We loved his art, and we knew that the website had to showcase both his specific pieces, and his unique style.
Early in the journey, we settled on the concept of re-imagining and digitally re-creating his physical art studio: leveraging the capabilities of WebGL to create an immersive online artistic experience that tells his story and represents the amazing work he creates.
The Design and Development Process
At the core of this project were two foundational principles: collaboration and experimentation. In order to get the most out of WebGL, it’s important to blend the design, 3D and development teams to ensure you’re maximising the potential of each expression: great projects are rarely the result of a designer moving a finished layout to a developer who is tasked to literally translate the design to code. Quality comes from collaboration and experimentation, which is as much the case for creative development as it is for design or 3D development.
The 3D studio
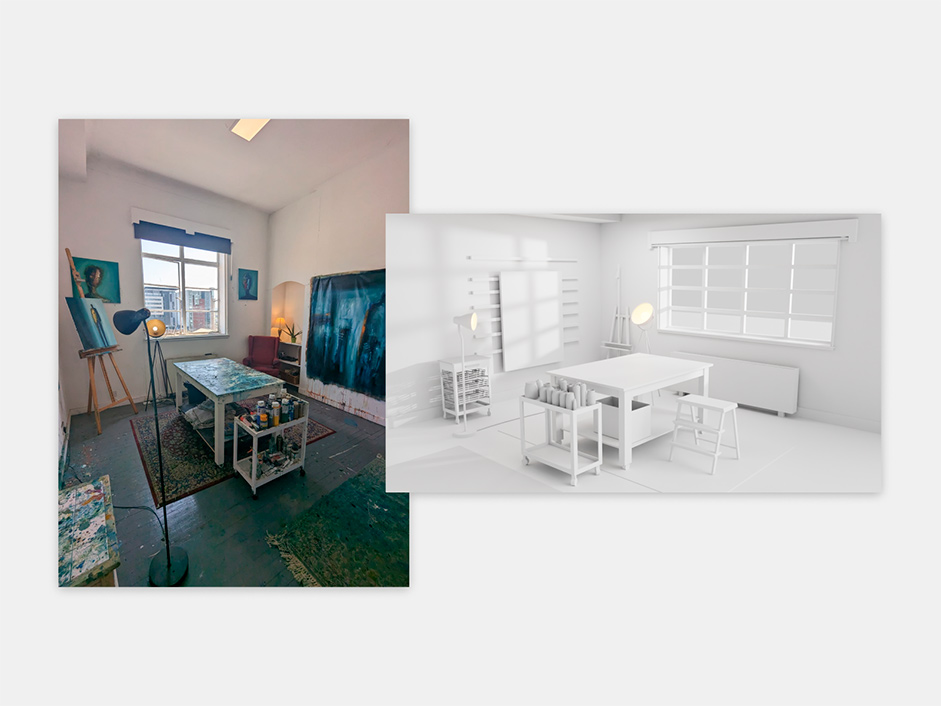
Achieving a proper representation of David’s world in 3D, while ensuring great load times, was the first challenge, and the team had to balance fidelity with optimization. Prioritising the essential details, our lead 3D artist Danny leveraged high-resolution textures instead of intricate geometry, coupled with strategies like mesh decimation, Level of Detail techniques, and backface culling. This resulted in a highly performant asset for our WebGL team to work with.
Moreover, it became evident that a direct one-to-one representation wouldn't align with the perspectives envisioned for the website, so liberties were taken with scaling, resulting in a version that, while evocative of David's studio, was sculpted specifically for the digital realm. It was important not to get too hung up on things being literal.
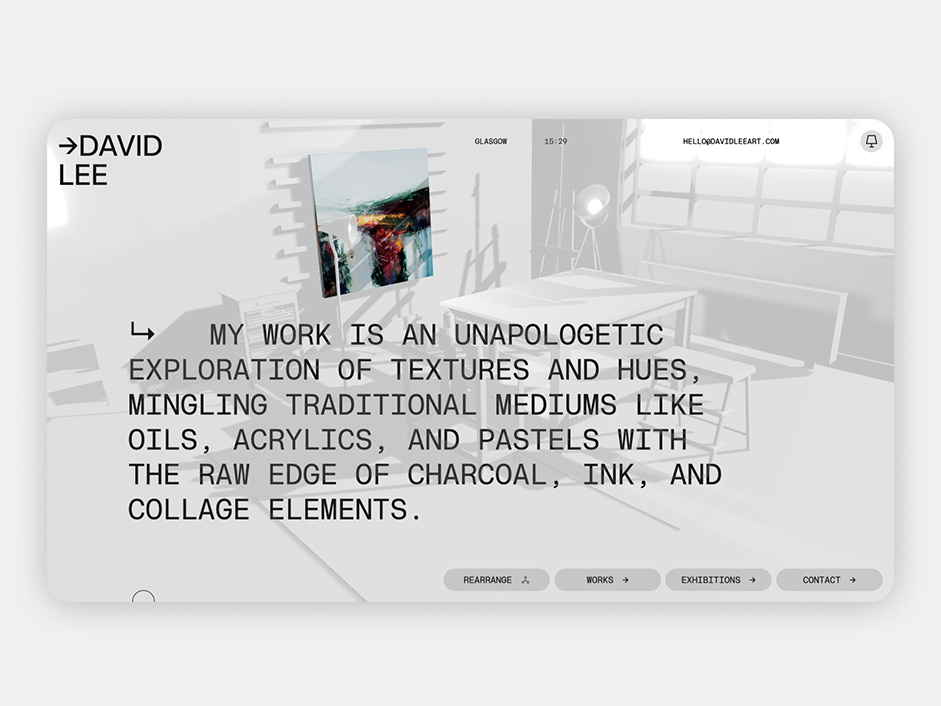
The “Blank Canvas” Effect
While developing this virtual space, the decision was made to depict the studio initially as a blank canvas. This allowed the UI and David's artwork to stand out. However, we're acutely aware that artists' studios are often characterised by their chaos. To honour this authenticity, features were embedded to let users layer in texture, mirroring the eclectic mix of materials typically found in an artist's workspace.
This design choice culminated in the "Mess it up" function, encapsulating the organic, ever-evolving nature of a creator's sanctum.
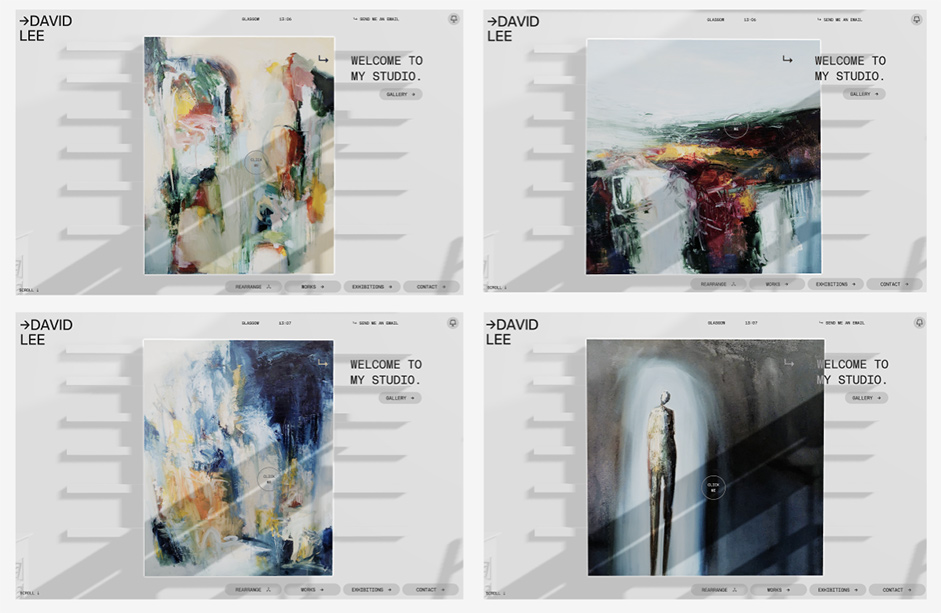
Hero Section
It was an obvious decision to ensure David’s pieces took centre stage. On page load, we see his real-life canvas with his real-life pieces textured on top, which you can click through. The canvas size dynamically changes with each piece, which was a nice touch brought to life in development.
Mess it up & WebGL playground
Bringing real time physics into the 3D world also adds something visceral to the experience.
That’s a lot of extra development time but well worth it. To make this work properly, it became necessary to work with real-time lighting and shadows to compliment the texture-less look, ultimately, it was the introduction of real-time physics that gave this feature its lifeblood, offering a visceral authenticity to the digital environment - but it was a huge undertaking for a hidden easter egg.
While we moved through development, the team brought up new ideas.
-
Tapping objects to add textures from David's paintings to customise the room.
-
Adding an RGB shift during scrolling and dragging to add some colour.
-

-
Tapping lights to switch them and their shadows on and off.
-
Adding a dark mode with minimal lighting.
A lot of small changes were added during the creative development phase, all which added up to a much better, richer experience.
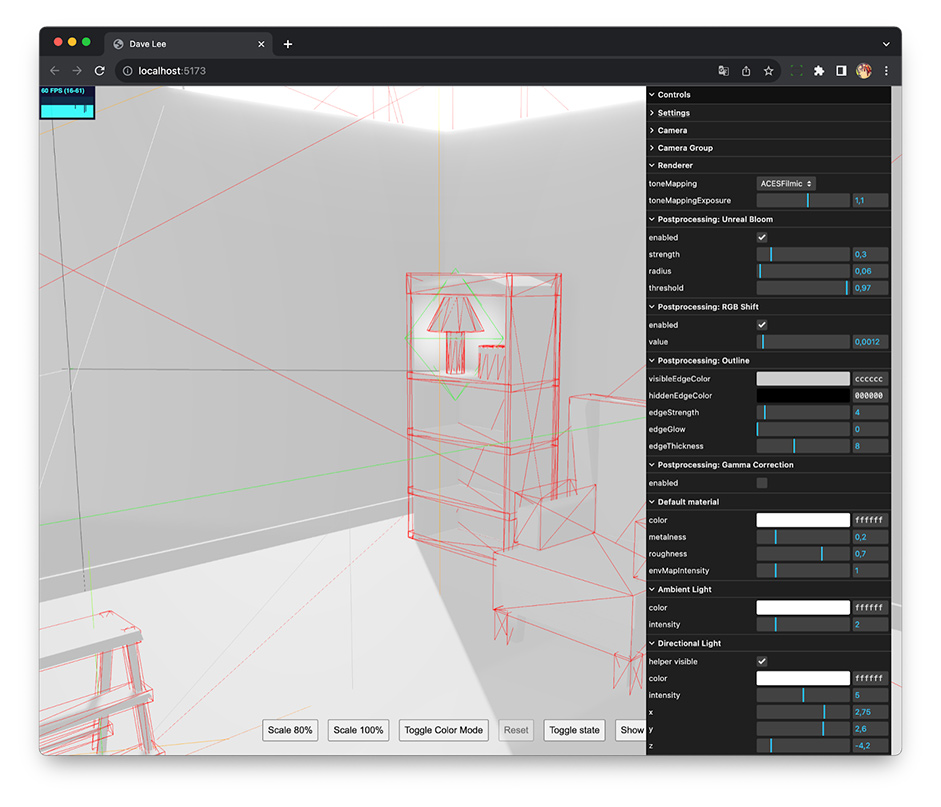
Development challenges
In the process of building the WebGL component for the studio, there was a noticeable absence of an Integrated Development Environment (IDE) tailored for such development. Given that the WebGL section largely consists of raw code and its corresponding runtime environment, visualisation tools were essential for gauging progress and troubleshooting.
To address this challenge, a combination of built-in (native) and custom-designed (homegrown) helper tools were utilised. These tools provided insights into various aspects of the build, especially in relation to lighting effects and physics behaviours.
When integrating the Cannon.JS framework for physics, it was crucial to optimise for both performance and visual fidelity. To achieve this balance, the Cannon.JS-associated wireframes or 'skeletons' were designed to be as streamlined as possible. This ensured that while users experienced realistic physics interactions, the system did not get bogged down by overly complex computations.
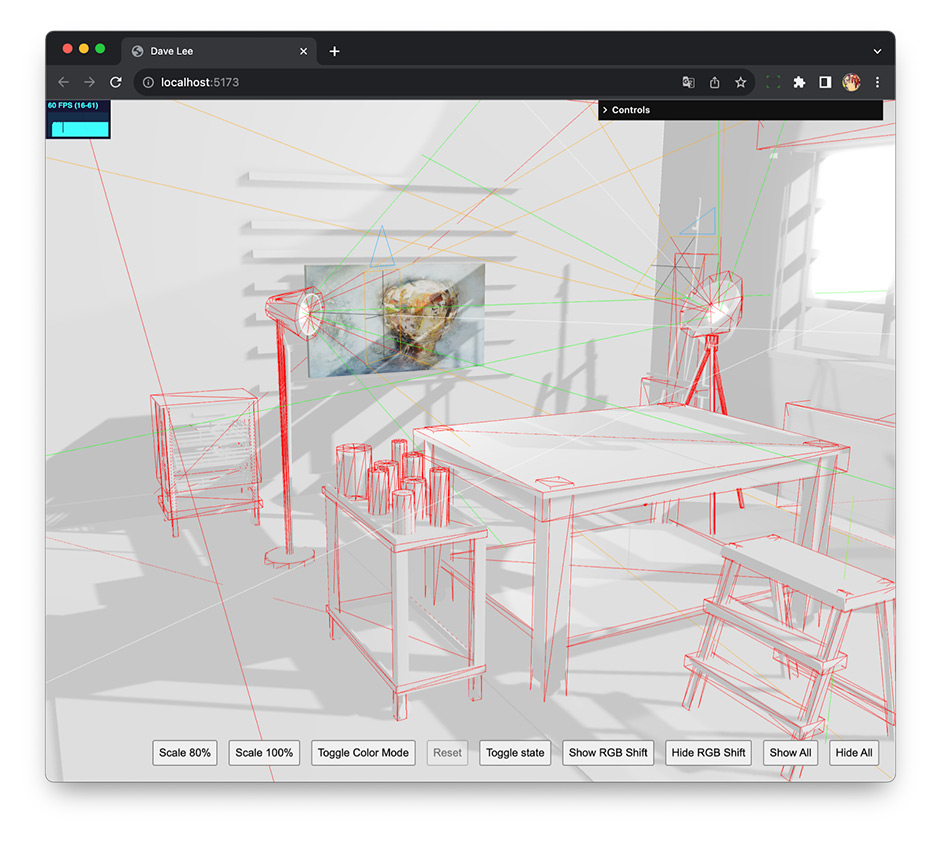
And our team, as always, likes to make lavish use of controls to tweak settings, like material options, lights and post processing settings.
Technologies
UI/Framework: Webflow
WebGL: Three.js
Physics: Cannon.js
Motion: GSAP
Packaging: Vite